# Settings
# General Settings
This page can be used to define settings that affect all accounts.
# General
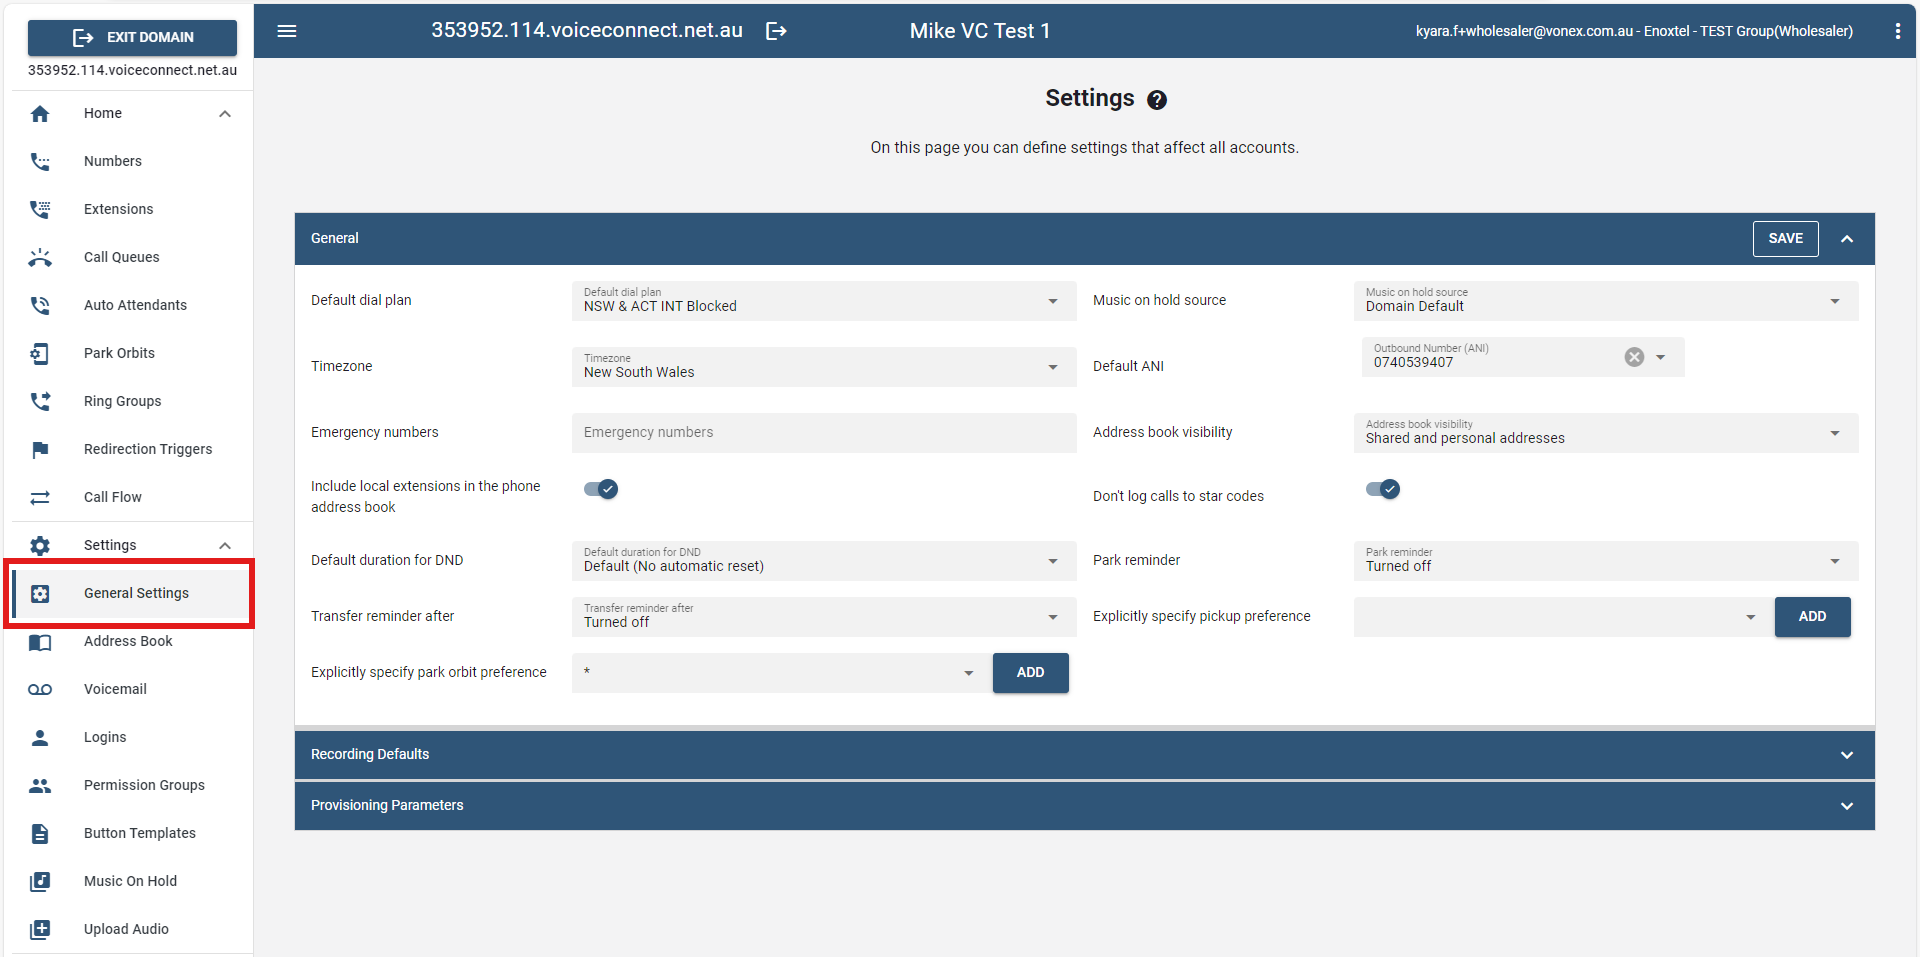
Default Dial Plan: This dial plan will be used by the domain, but users can override this with their own dial plan based on need. Most of the accounts in a domain will use the default dial plan. Problems with placing outbound calls will happen if the default dial plan is not set. Therefore, it is strongly recommended to choose a default dial plan.
Music on Hold Source: Select the source of music that will be used when a call is put on hold. The party who is on hold hears the music that is chosen here.
Timezone: The system can handle multiple time zones simultaneously, making it possible for users to select a time zone that corresponds with their geographic location. This setting influences the time on mailbox messages and the telephone display. Before the system can apply the time zone to the user's extension, it needs a time zone configuration file (timezones.xml). The name of the time zones is reflected in the lang_xx.xml file, where xx is replaced by the respective language.
Default ANI: Using this setting, each domain can be configured with a default ANI (Automatic Number Identification).
Emergency Numbers: This setting specifies which numbers will be considered "emergency numbers" on the domain. Once the user dials an emergency number, the system sends an email alert to the configured extension if an alert has been configured for this type of system event. The system also dials the local police station number that was entered into the user's Emergency Destination Number setting. To set the callback number for the user. A general callback number for all users across the domain can also be set using the ANI for emergency settings.
Address book visibility
Include local extensions in the phone address book
Don't log calls to star codes:
Default duration for DND:
Park Reminder: When someone parks a call, there is a risk that this call stays in the park orbit for a long time, without anybody taking care of the caller. The park reminder will call the one who parked the call back after a certain timeout if the call was not picked up by somebody else.
Transfer reminder after: Similar to the park reminder, there is a risk that after a blind transfer, the caller ends up with a ringing call, but nobody picking up. The transfer reminder will transfer the call back if the call cannot be connected.
Explicitly specify pickup preference:
Explicitly specify park orbit preference:
# Recording Defaults
This section allows the user to define domain-level call recording settings. Recorded calls will be saved in the recordings’ directory.
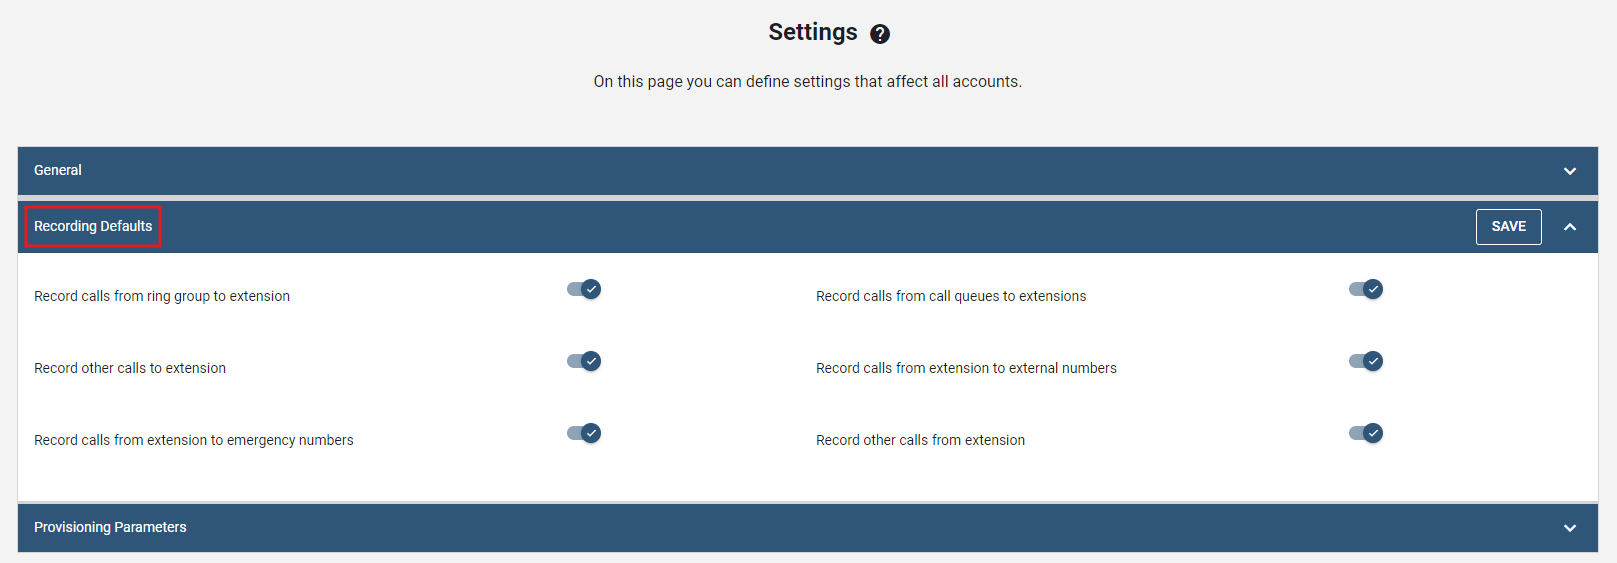
- Record calls from ring group to extension: This setting controls the recording on an extension (applies to calls coming from the ring group for the entire domain).
- Record calls from call queues to extensions: This setting controls the recording on an extension (applies to calls coming from the call queue for the entire domain).
- Record other calls to extension: This setting controls the recording on an extension (applies to calls coming to another extension for the entire domain).
- Record calls from extension to external numbers: This setting controls the recording on an extension (applies to calls going to external numbers for the entire domain).
- Record calls from extension to emergency numbers: This setting controls the recording on an extension (applies to calls going to an emergency number).
- Record other calls from extension: This setting controls the recording on an extension (applies to calls coming from another extension for the entire tenant).
# Provisioning Parameters
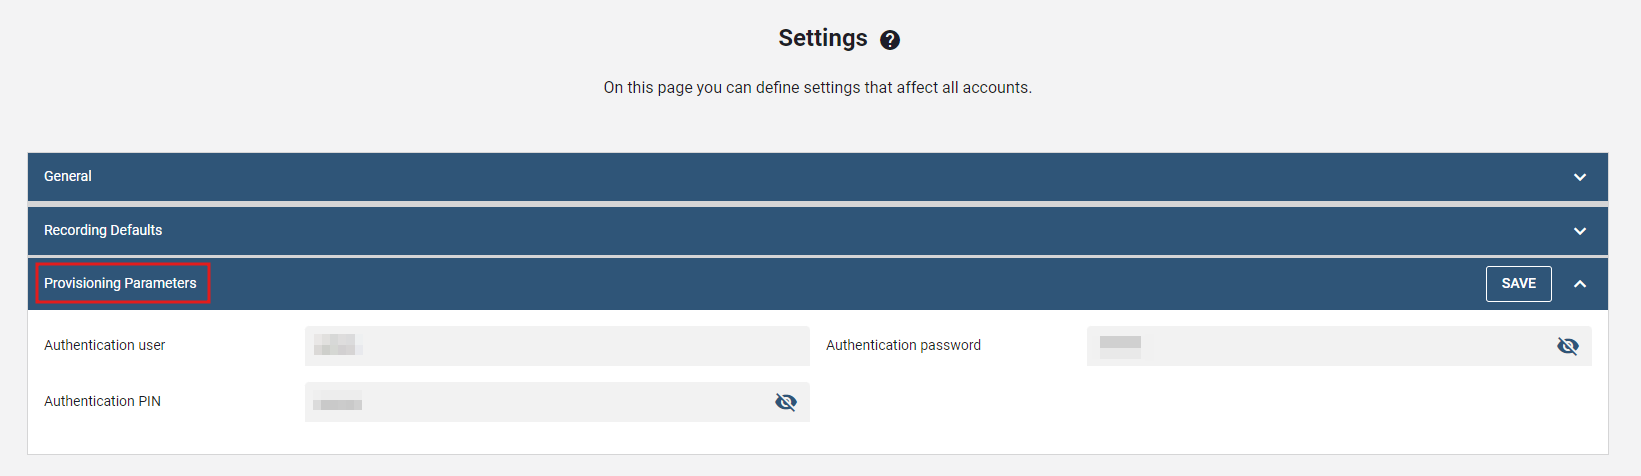
- Authentication User/Password: This setting makes it easier to carry out domain level settings of phones. Using this setting, the administrator can create identical user names and passwords for all devices in a domain.
- Authentication PIN: This setting allows you to override the user's PIN, which is used on the phone itself. Administrative access to the phone allows you to reset the phone.
When logging into the phone you will see a pop up of user/pass. You will use the credentials you have entered into the Provisioning Parameters section.
In most cases administrators overlook this setting but it should be the 1st setting you configure on the system if you plan to plug and play snom devices so that you can enter your phone's web interface.
If you want to use admin mode on the phone you will have to enter the Authentication pin.
# Address Book
The domain address book allows users on the same domain to easily call each other and to see who’s calling. Users can search for contacts from either the web interface or from their IP phones. From the address book, contacts can be whitelisted or blacklisted, and CMC codes can be added to a contact’s information. Address books can be uploaded to the user's phone.
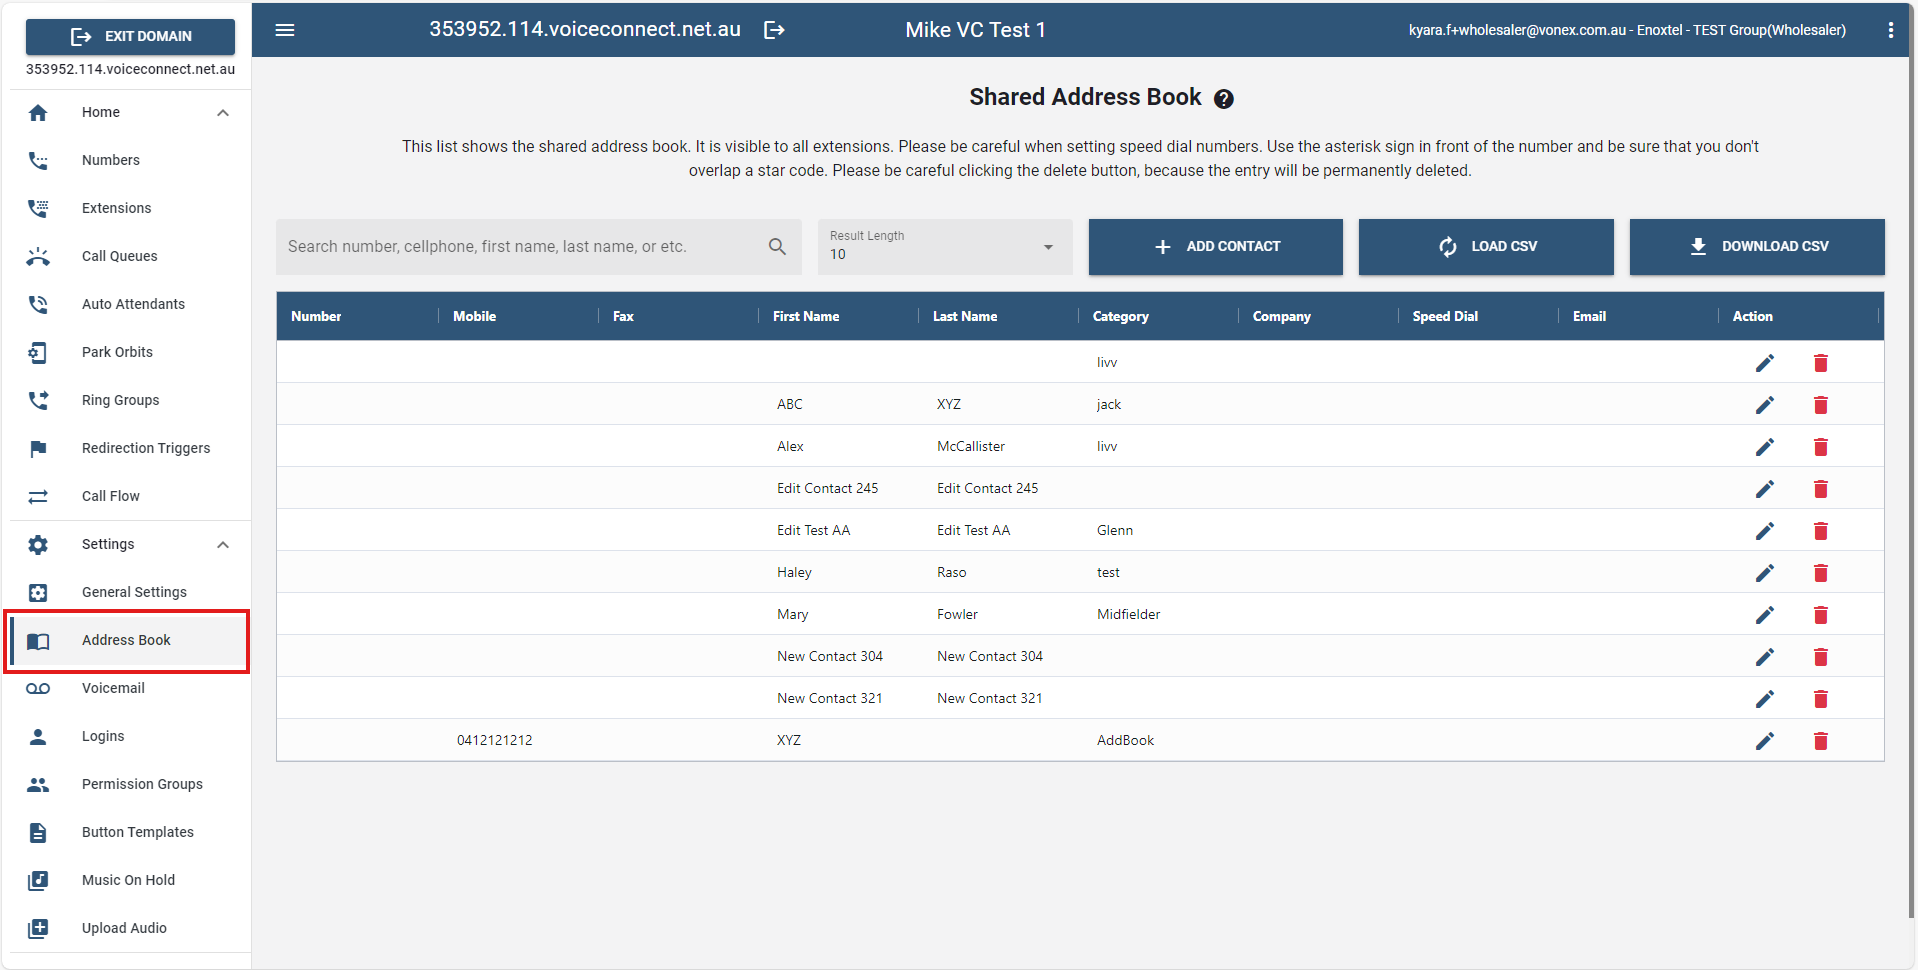
- To look for the contact easily, search the number, cellphone, first name, last name, etc. in the search field.
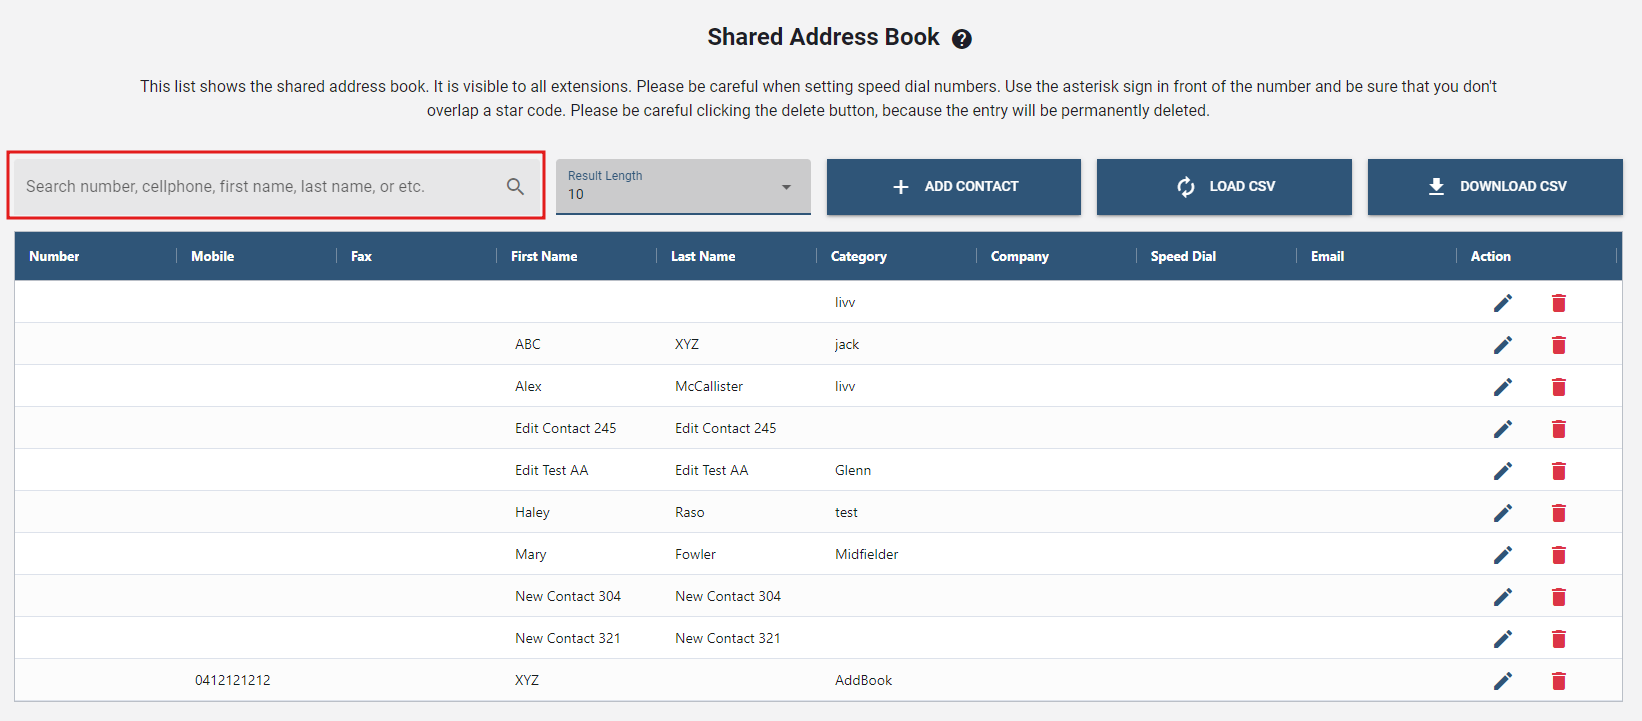
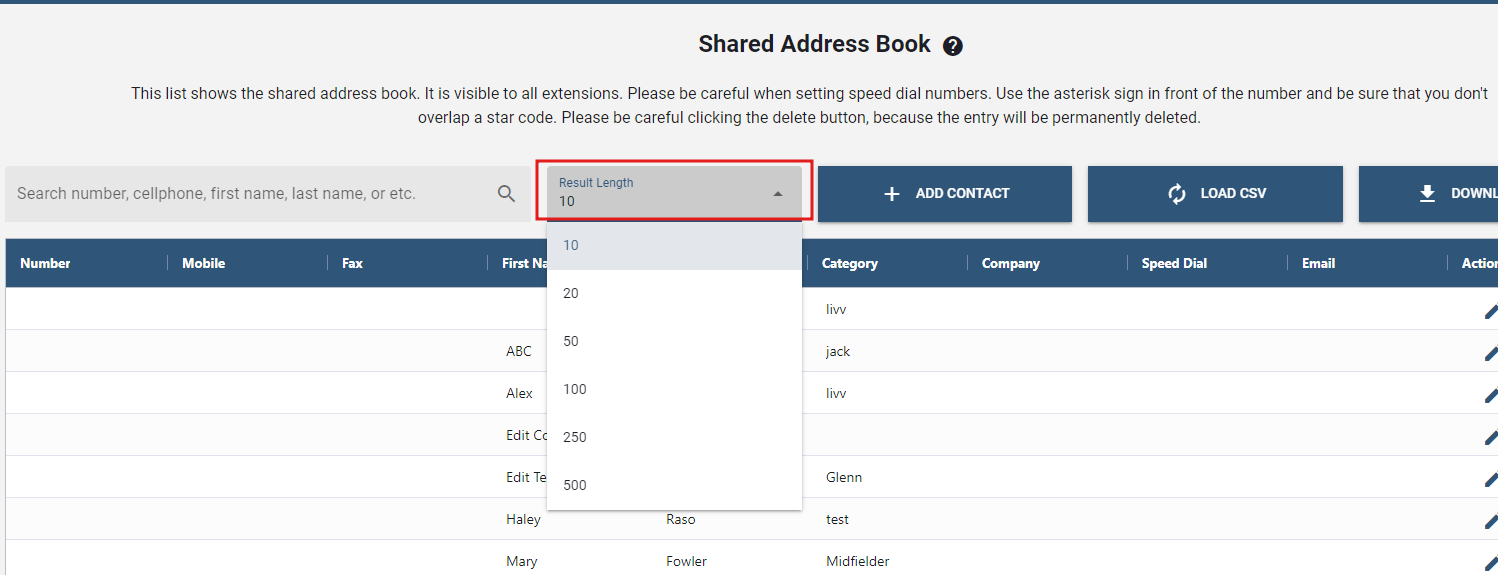
- In the Result length field, users can control how many numbers they want to be displayed in the table.
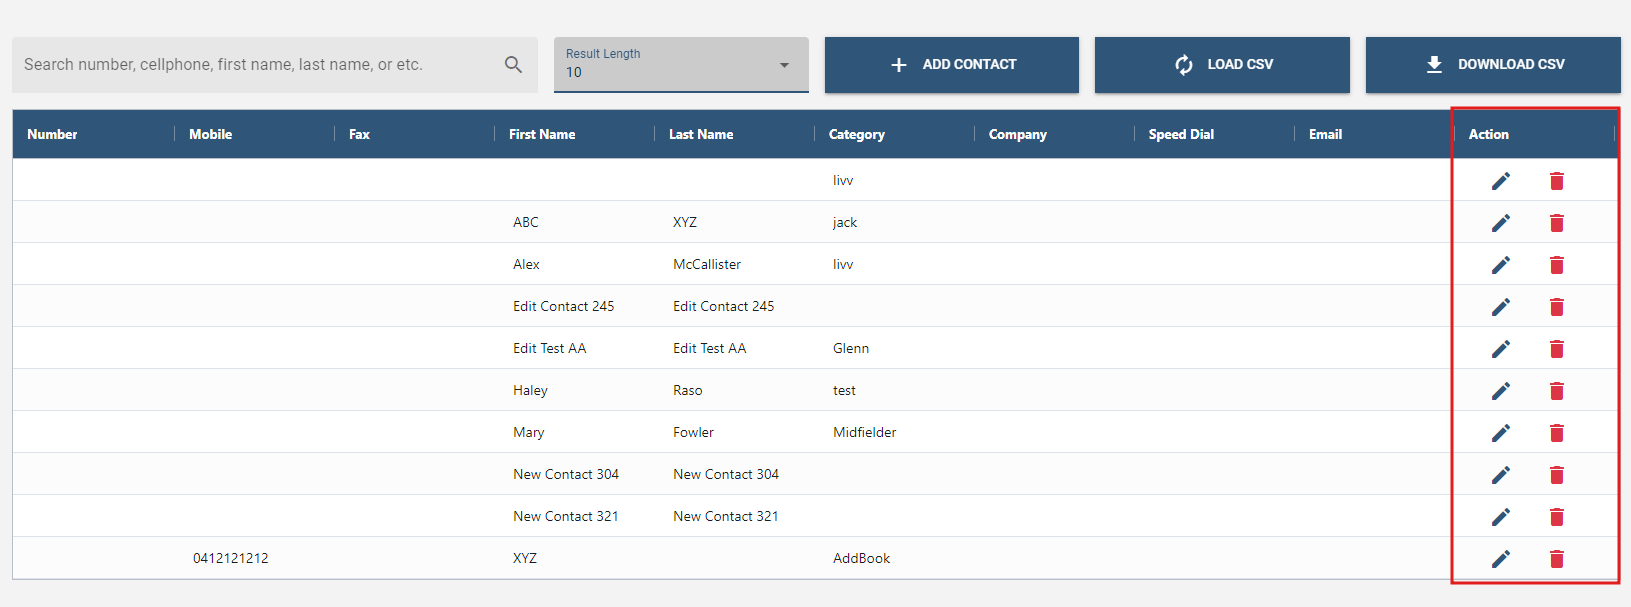
- Configurations and removing of entries can be done through the icons under the Action column.
# How to ADD Contact
- In the Address Book tab, click on the button.
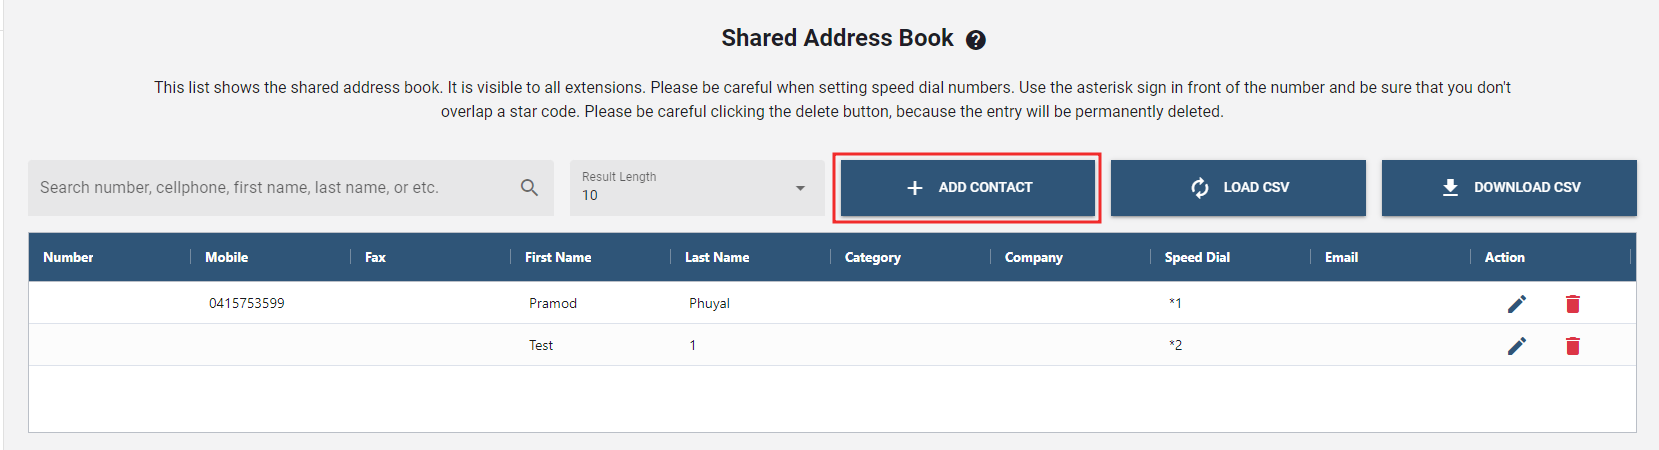
- Enter your information into the Create New Entry form.
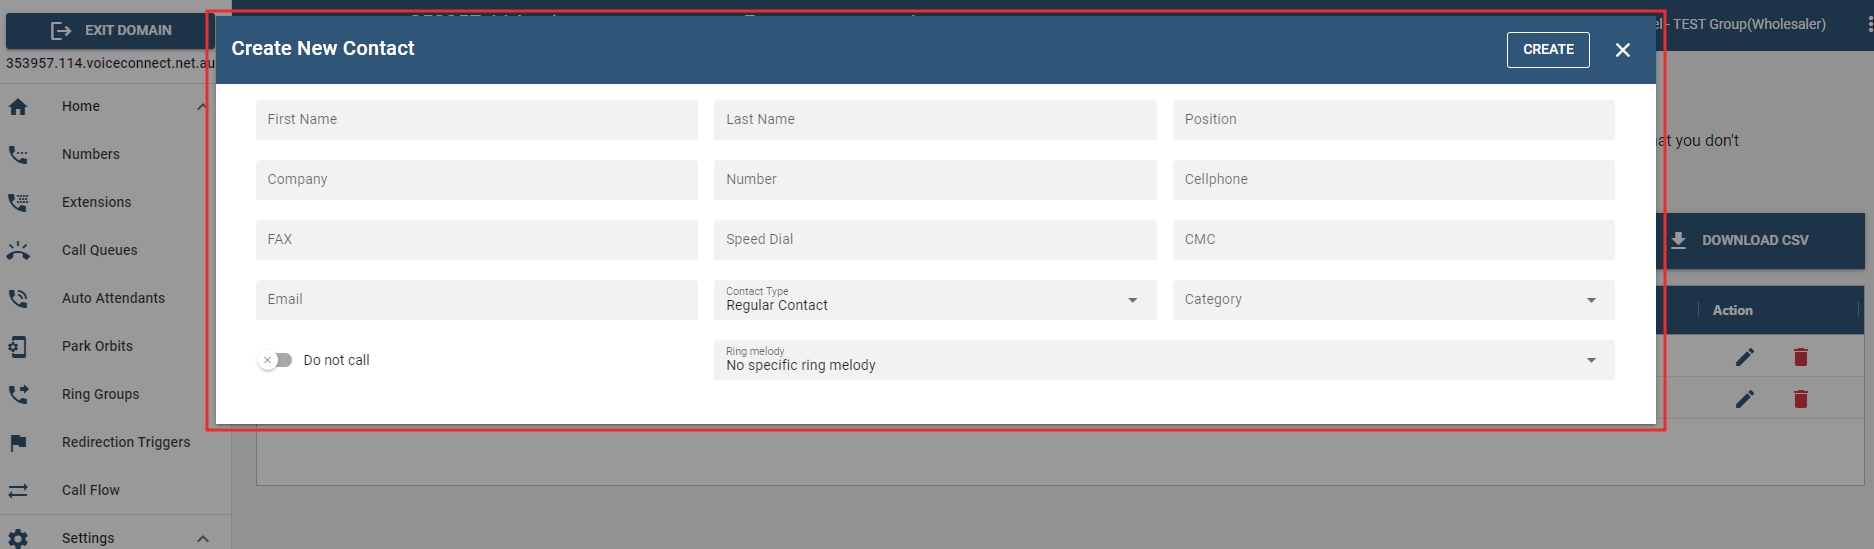
- Speed Dial : You may use a two-digit star code to speed-dial this contact. Note that these star codes cannot overlap with any of the standard star codes.
- CMC : The CMC identifies the customer in the CDR report and is used to expedite billing in offices that bill their clients for phone calls, such as law offices and other businesses that track time spent with clients. As long as the CMC has been added to the address book and the caller is calling from the phone number that is associated with that CMC, the CMC will automatically appear in the CDR report. The CMC can also be entered directly into the display of the phone (by pressing the CMC soft key) if the person is calling from a number other than the number that is in the address book.
- Contact Type : The Contact Type dropdown allows you to blacklist or whitelist a contact.
Once done, click .
Once contacts have been added to the domain address book, their information will be displayed to the user they call.
# Voicemail
This section provides users with abillity to customize and manage their voicemail settings.
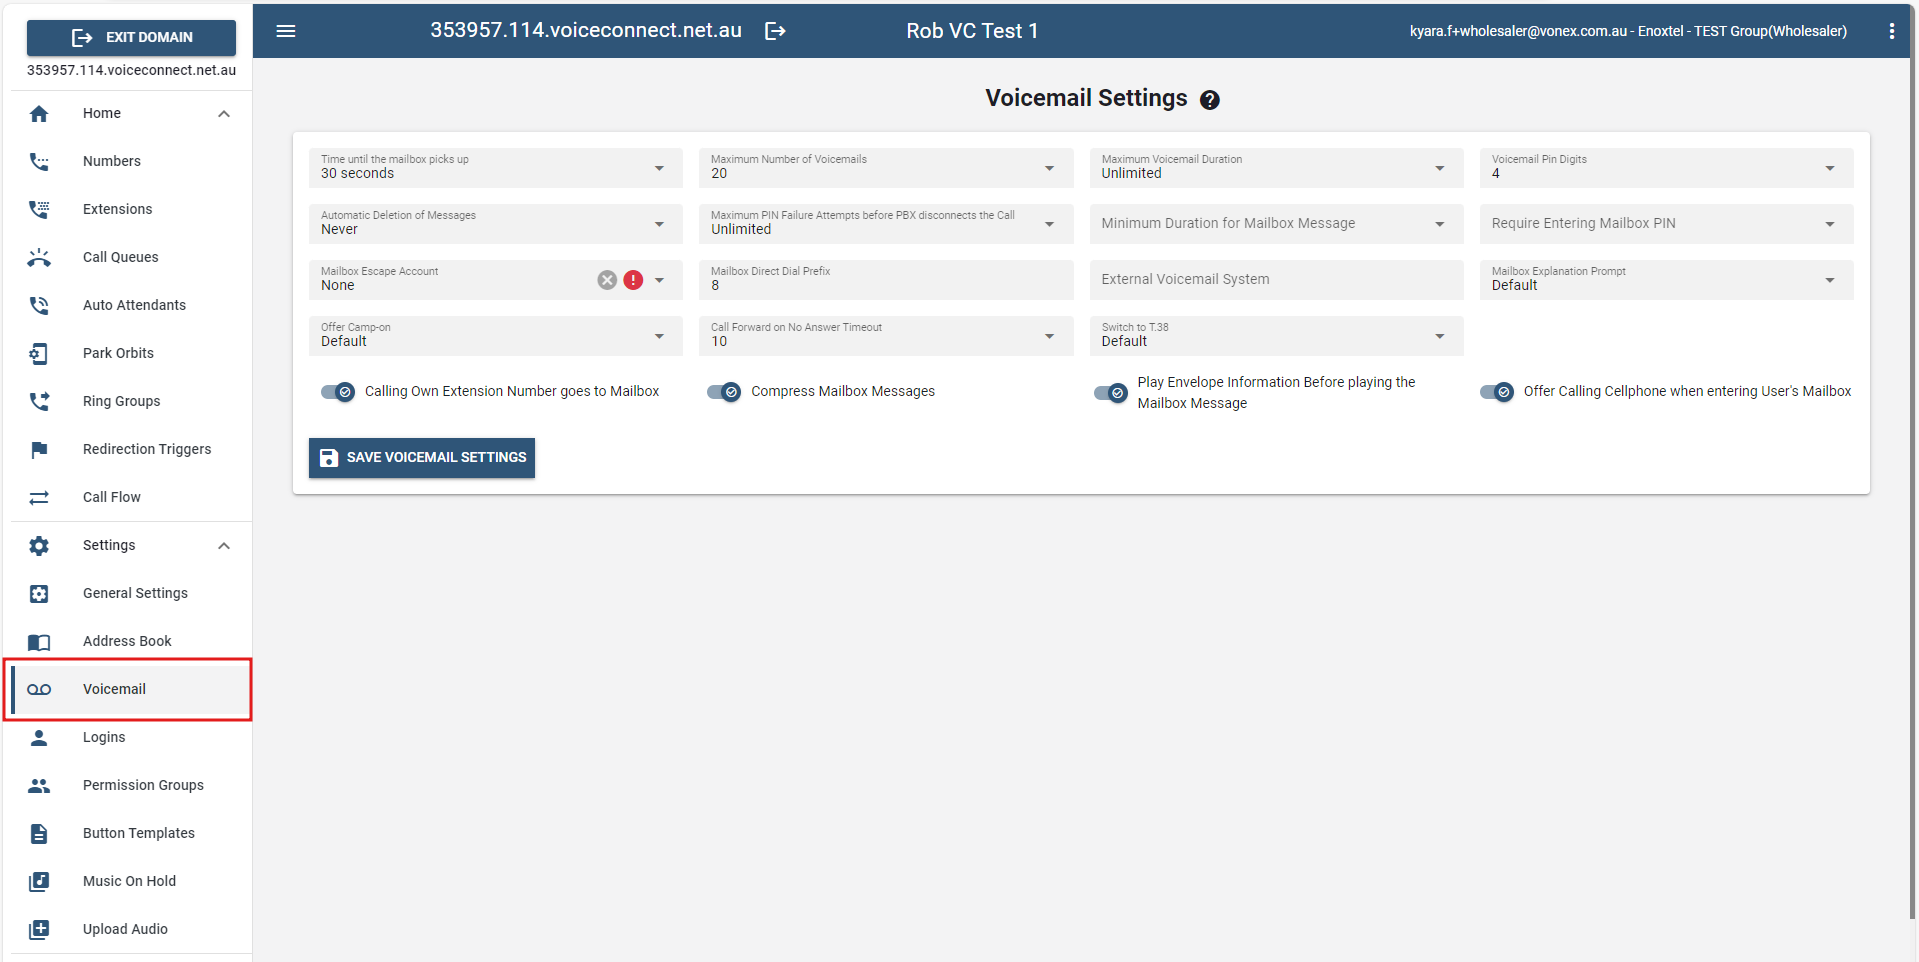
# Explanation of the Settings
- Time until user’s mailbox picks up : This setting defines the number of seconds the system will wait before redirecting a call to a user’s mailbox when there’s been no pickup. You may override this setting in the settings for a specific extension. If you plan to use cell phones with the system, choose a longer voicemail timeout (e.g., 30 seconds), as the call setup time for a cell phone call can be lengthy and the user might need to search for the cell phone. If you do not plan to use cell phones, you can choose a shorter timeout (e.g., 15 or 20 seconds).
These next two settings allow you to specify memory capacity for voicemail messages. When configuring these settings, consider the size of your system and the information shown the table shown below.
- Maximum number of voicemails : This setting determines the number of messages that can be stored in a user’s voicemail box. Although this setting can be overridden by the user, a reasonable default should be set at the domain level (20 is a good default number).
- Maximum Voicemail Duration : This setting specifies the length of a mailbox message. Typically, a mailbox message should be no longer than 2 minutes. Number of UsersSettingsDisk Space Required
Voicemail SizeVoicemail DurationEach UserAll Users*
10252 min5 MB50 MB
101002 min20 MB200 MB
100252 min5 MB500 MB
1001002 min20 MB2 GB
*Assuming storage as umpressed audio
- Voicemail PIN Digits : This setting specifies the number of digits that will be required for the voicemail PIN. Although any number larger than one digit is acceptable, we recommend you require four or five digits. See also the PIN setting in the extension account.
- Max PIN failure attempts before PBX disconnects the call : This setting allows the domain administrator to set the number of failed attempts before the PBX disconnects the call. This setting is useful when someone else tries to access your mailbox and repeatedly enters the wrong PIN. Note: This setting is currently a domain-level setting, but in the future we can extend it to the extension level if necessary.
- Require Entering Mailbox PIN : When this setting is enabled, users will be required to enter their PIN before retrieving voicemail messages. While retrieving messages should be simple, many office layouts often make it too easy for an unauthorized person to listen to another’s voicemail messages without authorization. This setting can be used to prevent this across the domain.
- Calling own extension number goes to mailbox : By default, the system will send a user to the voice mailbox if he dials his own extension. However, in some situations it is useful to have the system call the registered extension.
- Mailbox Escape Account : If the Mailbox Escape Account setting is set, a user who reaches the mailbox can press 0 to get to the account that you specify here (the user must press 0 before the beep). The number must be an internal number.
- Mailbox Direct Dial Prefix : This setting allows users to call directly into their mailboxes or transfer a caller directly to a user’s voicemail without having to wait for the voicemail timeout. Typically, this prefix is an 8, so by dialing 8511, the caller goes directly to the voicemail greeting of extension 511. If you want to explicity specify what announcement you would like to hear, you may append a star with the prompt index, for example 8511*2 to have the system play the 2nd personal announcement for that mailbox.
- External Voicemail System : This setting is used if you want to use an external voicemail system (e.g., Microsoft Exchange 2007/2010). The setting requires a telephone number that can be dialed and can include replacement fields which are used in the caller-ID representation for outbound calls. The dial plan for the called extension will decide which trunk will be used to send the call. See Appendix C for more information on Exchange.
- Mailbox Explanation Prompt : Users who configure their extension to play a personalized message when callers reach their extension can activate this setting so that the system will deliver an explanatory message after the playback of the personalized recording. The explanatory message explains that the caller may now leave a message and informs the caller of any other options. For standard greetings, the system always explains the options.
- Offer Camp On : This setting allows you to offer Camp On to callers, rather than limiting them to leaving voicemail or when the extension is busy. Callers will have the option to press 1 for a callback only if the callee has a valid caller-ID. Once the extension becomes available (The system will track a person’s availability by monitoring keypad activity, ring the extension with callback annoucement.
Note : Turn off the "camp on" feature if you are using external voicemail systems such as Microsoft Exchange.(skyblue)
- Call forward on no answer timeout : This setting establishes the number of seconds that the system will wait before performing a timeout action. It is advisable that this setting be less than the voicemail timeout; otherwise, the call will not be forwarded and will instead go to voicemail.
- Play envelope information before playing the mailbox message : When this setting is enabled, envelop information will be offered to the user while retrieving voicemail messages. To retrieve the information, the user can press #5. (If this setting is not turned on and the user presses 0 to hear more options, the envelop information will be offered at that point.)
- Disconnect the call on these error codes from a forked leg : This setting is useful in a multiple registration or cell phone forking case. By default, when the user rejects(by pressing the "X" button or "Reject" soft-key) the call on one of the many ringing devices(of the same extension), other devices continue to ring. User has to reject the call from every device in order to disconnect the call or send the call to voicemail. But by using this setting, you can force the PBX to disconnect the call (or send to voicemail) when user rejects the call at one location. The snom devices generally send 486, Polycoms send 603 error code to snomONE when the user rejects the call. So, if you use 486 603 for setting, then PBX will disconnect the call when user rejects the call at one location.
Note: Once any adjustments are made, simply click the "SAVE VOICEMAIL SETTINGS" button to confirm and save the updated configurations.
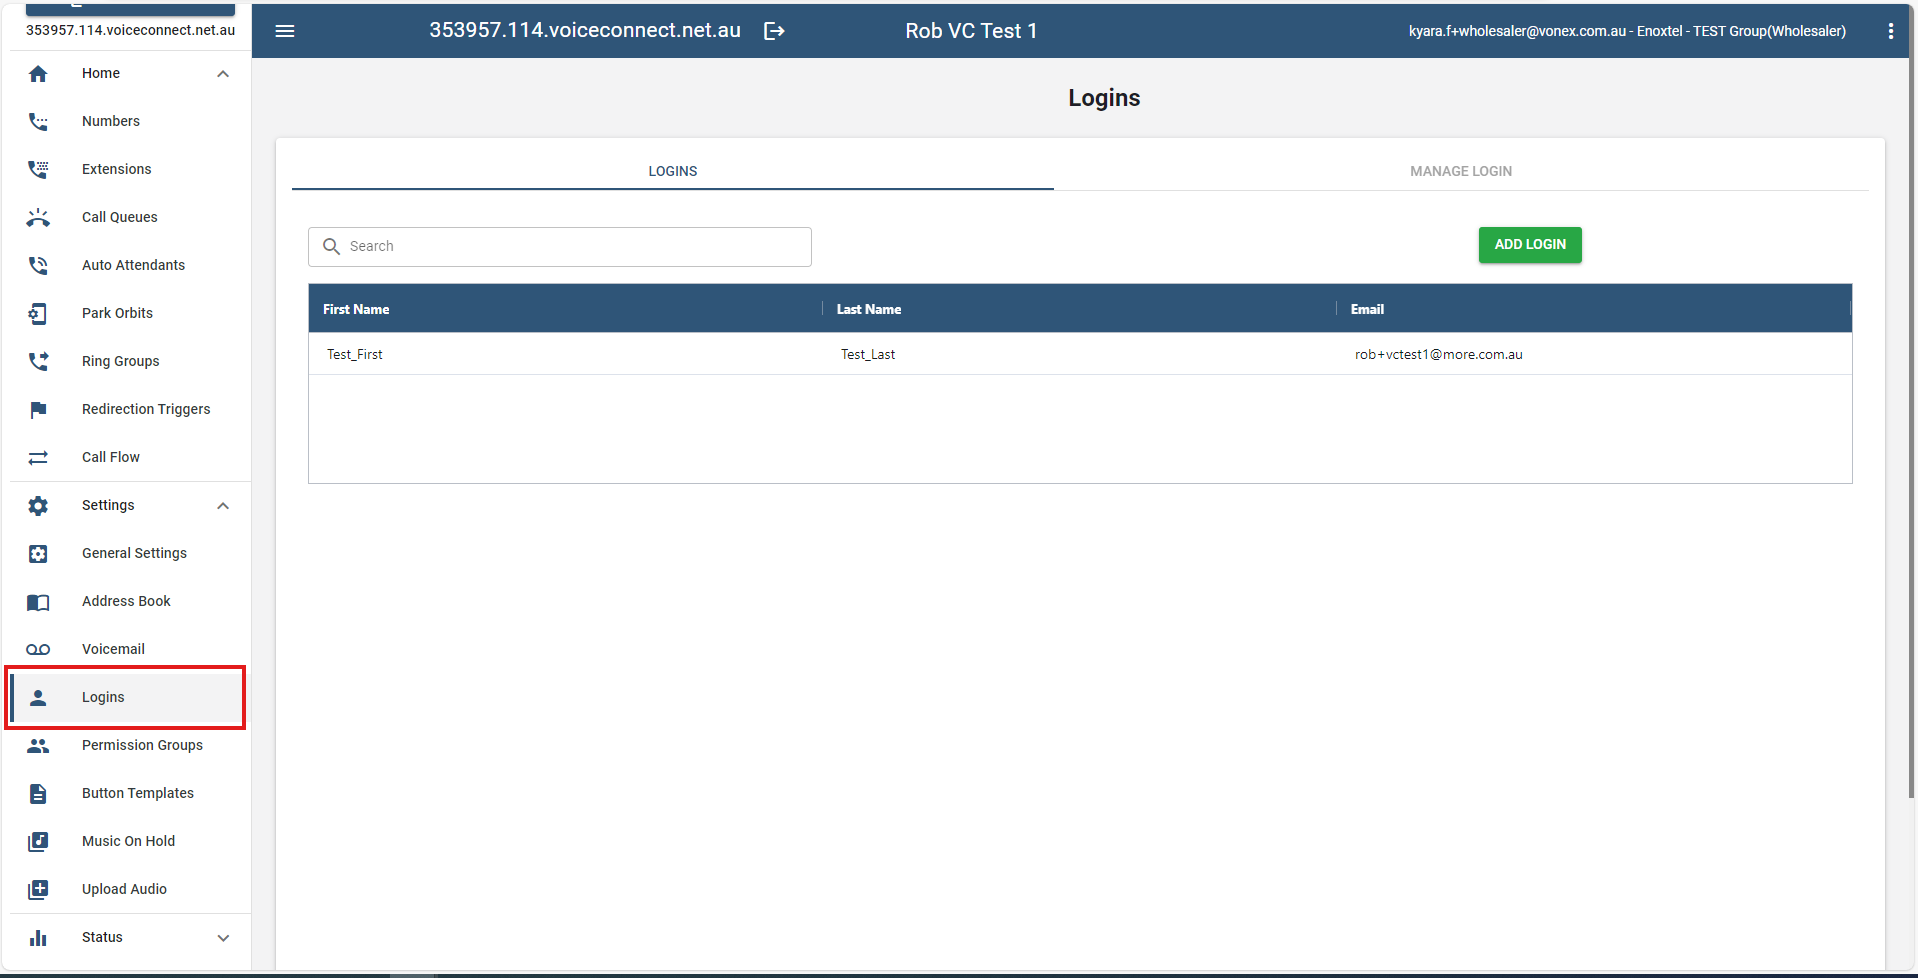
# Logins
# Permission Groups
There are many places where relationships between extensions and accounts need to be defined. For example, managers need access to certain ACD, or front desk staff needs to be able to see who has a voicemail in the office. For this purpose, the Link has groups.
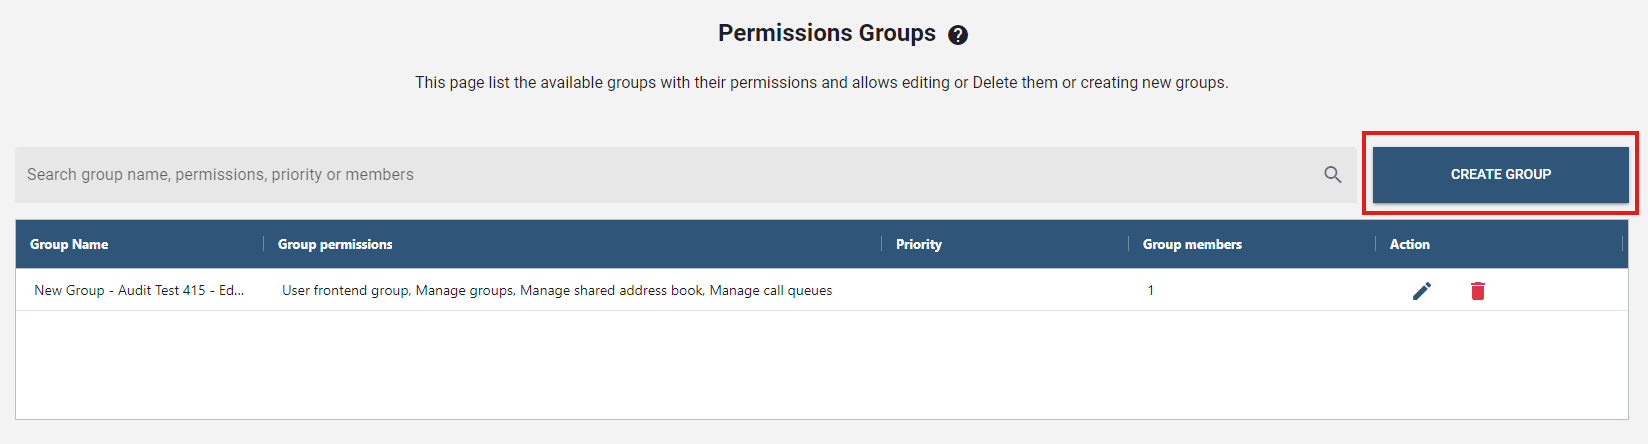
On this page, the list of available groups, including with their associated permissions, is displayed. Editing or deleting existing groups or creating new ones is also possible.
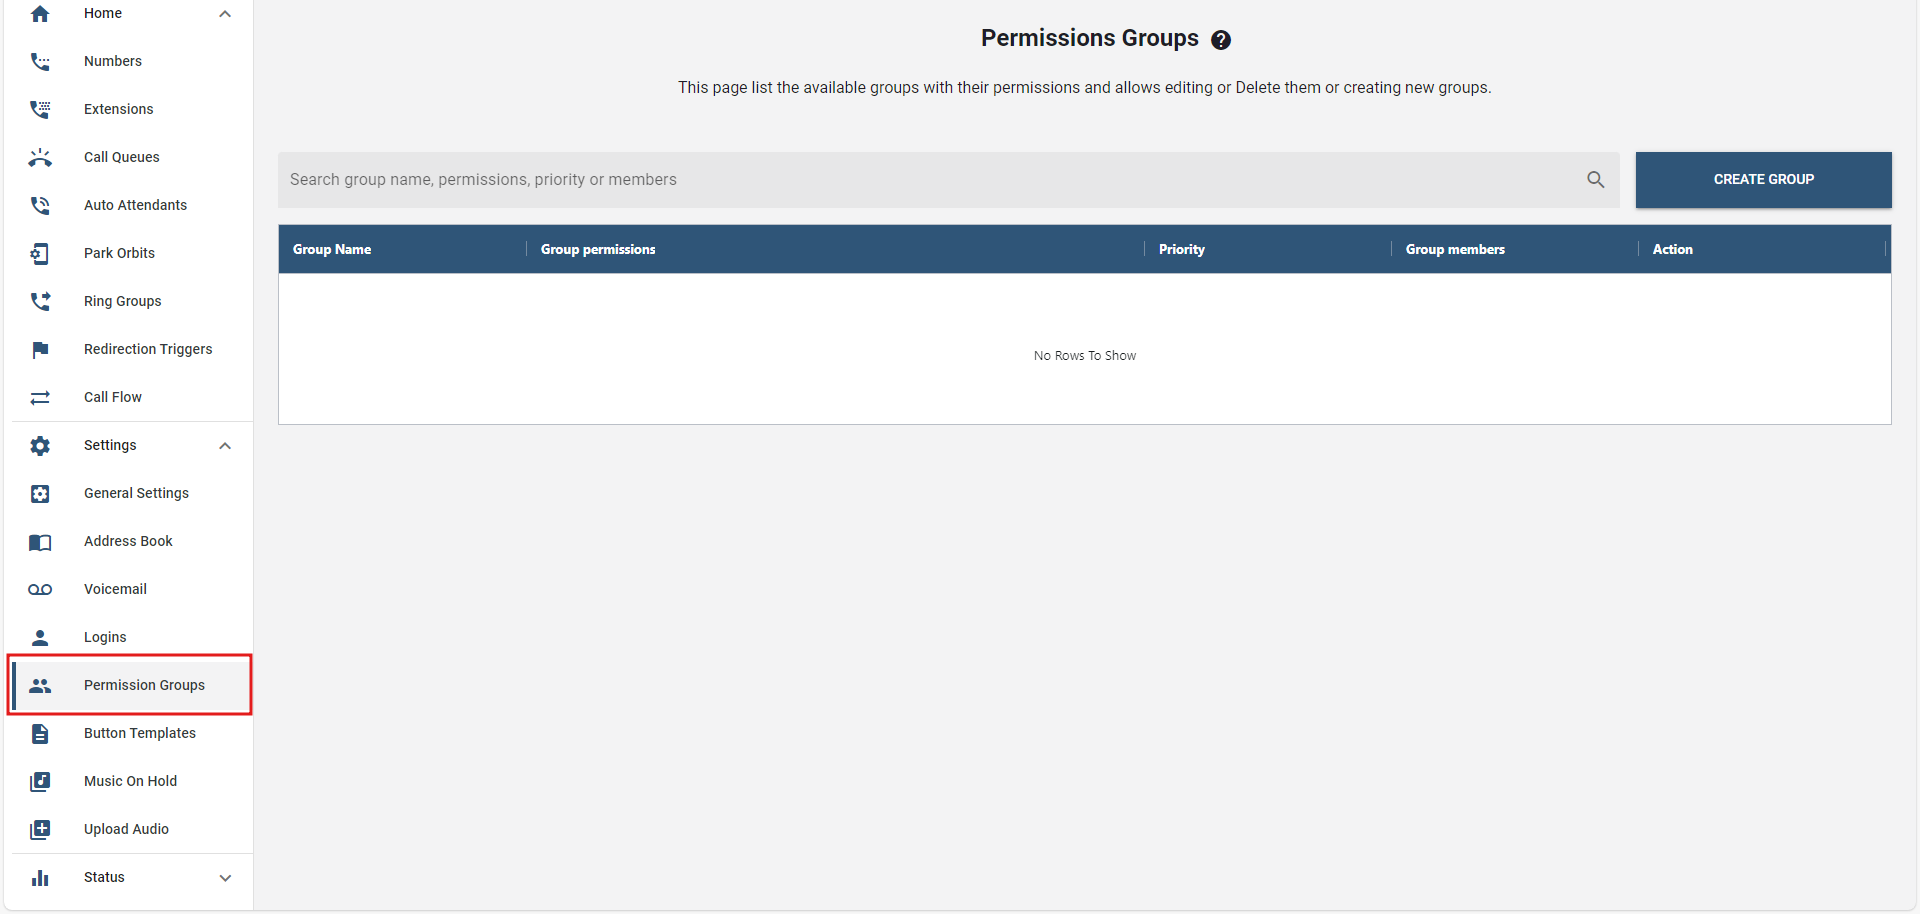
# Creating New Group
In the selected tenant in the Link web interface, go to Permission Groups under the Settings tab on the sidebar.
Click the "Create Group" button to create new group/s.
Then a new window will pop up to add the details of the new group.
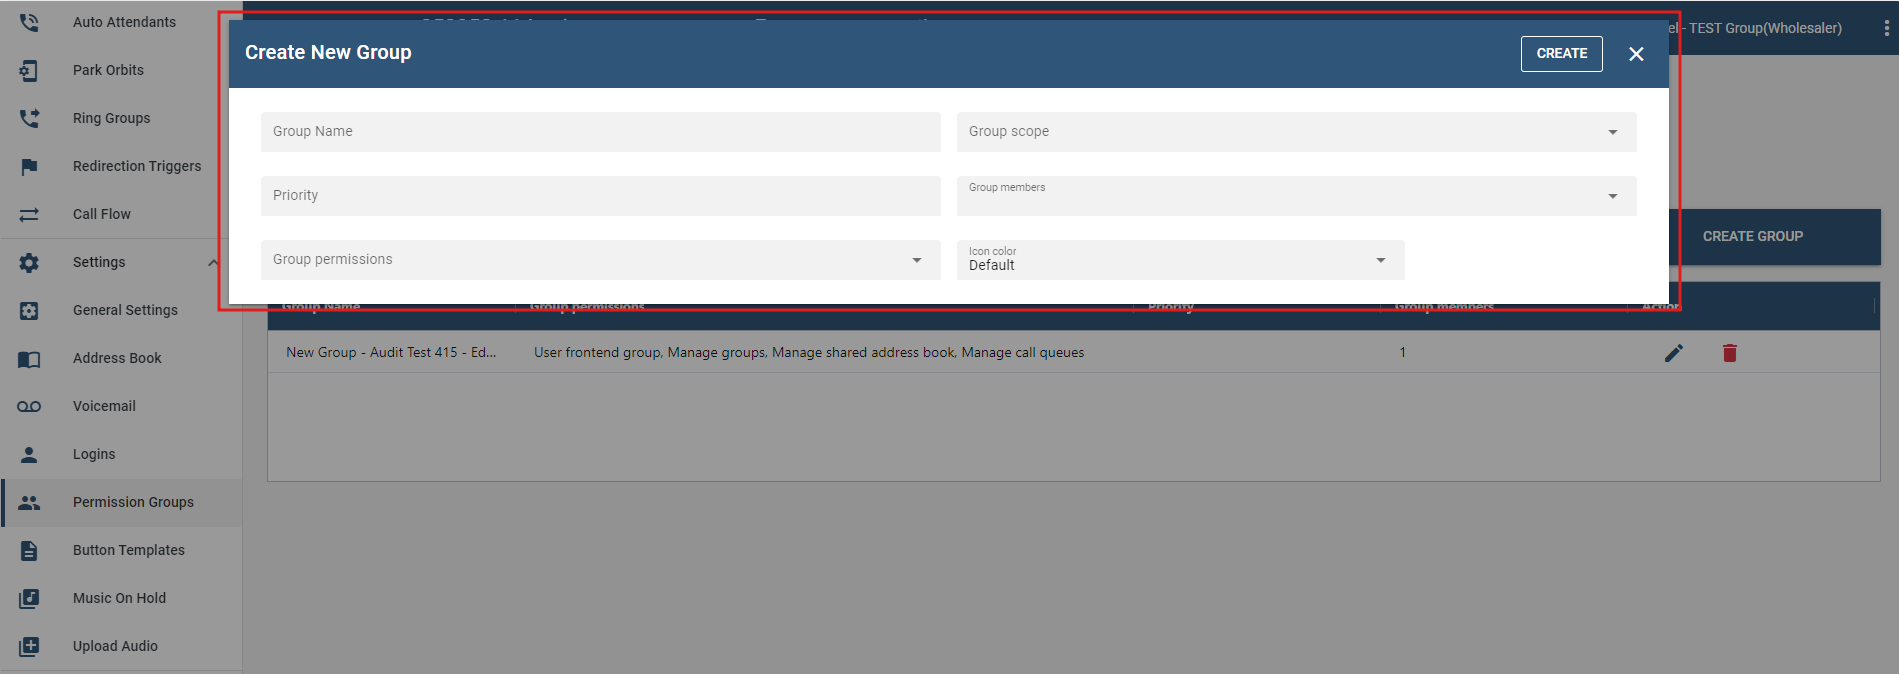
Group Name: This helps identifying the group. It typically also helps understanding what the purpose for the group is. For example "ACD Managers" would include the list of extensions that are allowed to manage ACD.
Group Scope: In many cases, the group members have permission regarding other accounts of the system. For example, a front desk person might have the right to call a VIP account. In that case, the scope of the group would be the VIP account. There are other permissions that do not need a scope, for example, the permission to edit the shared address book. In such cases, the scope is ignored. There are four types of scopes:
- Members of the group. This scope means that the group members are the same as the scope members.
- All accounts. With this scope, all accounts are included.
- Specific accounts. This type lists the accounts that are within the scope of the group.
- All except specific accounts. This type includes all accounts except the listed accounts.
Priority: To control the sequence in which groups appear in the front end, a priority can be assigned that helps sort the groups.
Group Members: Group members can be zero, one, or more extensions.
Group Permissions: A group can have zero, one, or more permissions, for example, the right to play back recordings and the right to change the address book. Each permission has a name which is just a short text, and which is referenced throughout the code of the PBX when needed.
Icon Color: Groups can have a color assigned. This makes the most sense for user front-end groups where the color helps identify groups.
Once all the fields are populated, click CREATE.
Following that, the newly created group will be displayed on the table and can be configured by clicking the "edit icon" under the Action column.
# Button Templates
Setting up buttons on phones is an extremely useful feature of Link. It makes it very easy and intuitive to set up buttons on the phones that it serves.
# Provisioning Buttons
On Link, it is possible to set up button profiles that can be assigned to different extensions.
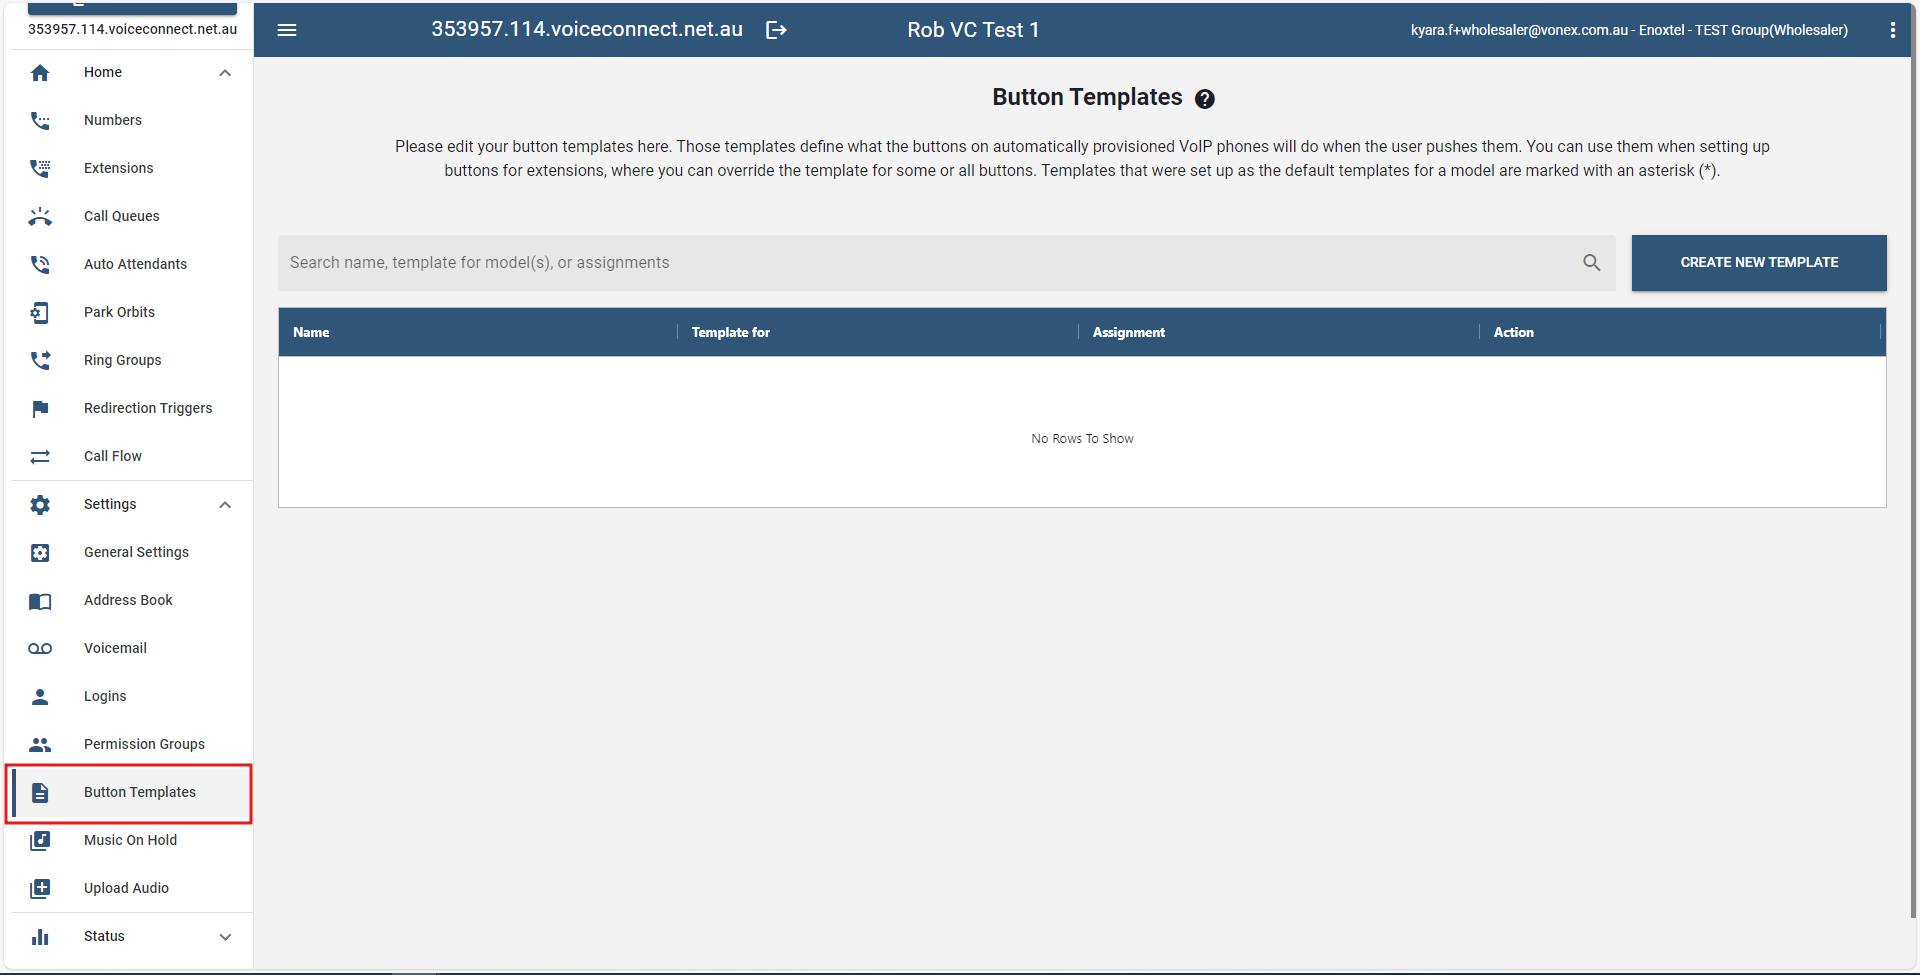
Also, a button profile can be modified to customize it for a particular extension. Those templates define what the buttons on automatically provisioned VoIP phones will do when the user pushes them. You can use them when setting up buttons for extensions, where you can override the template for some or all buttons.
The profiles that have " * " on them means they are the default template that is being used for that make and model of the phone.
# Creating Button Template
- On the buttons templates section, click on .
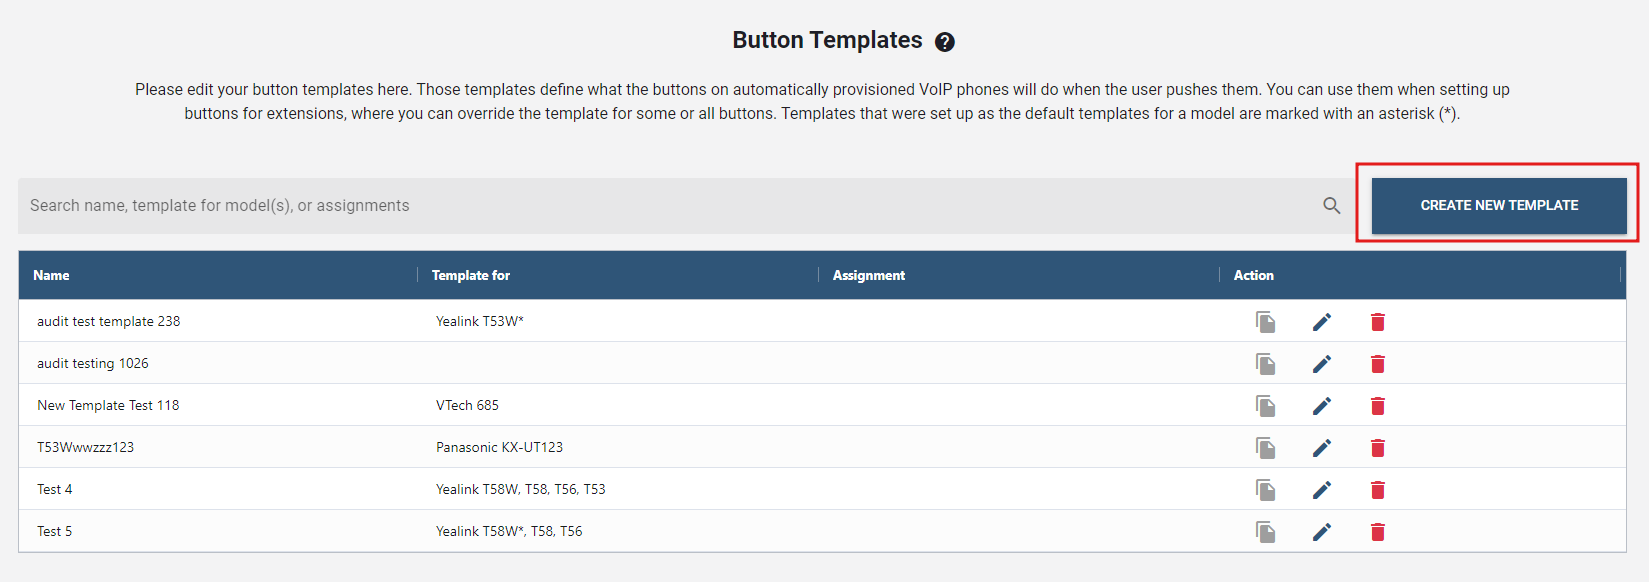
- Provide a name for the profile and;
- Click the button to create a new template.
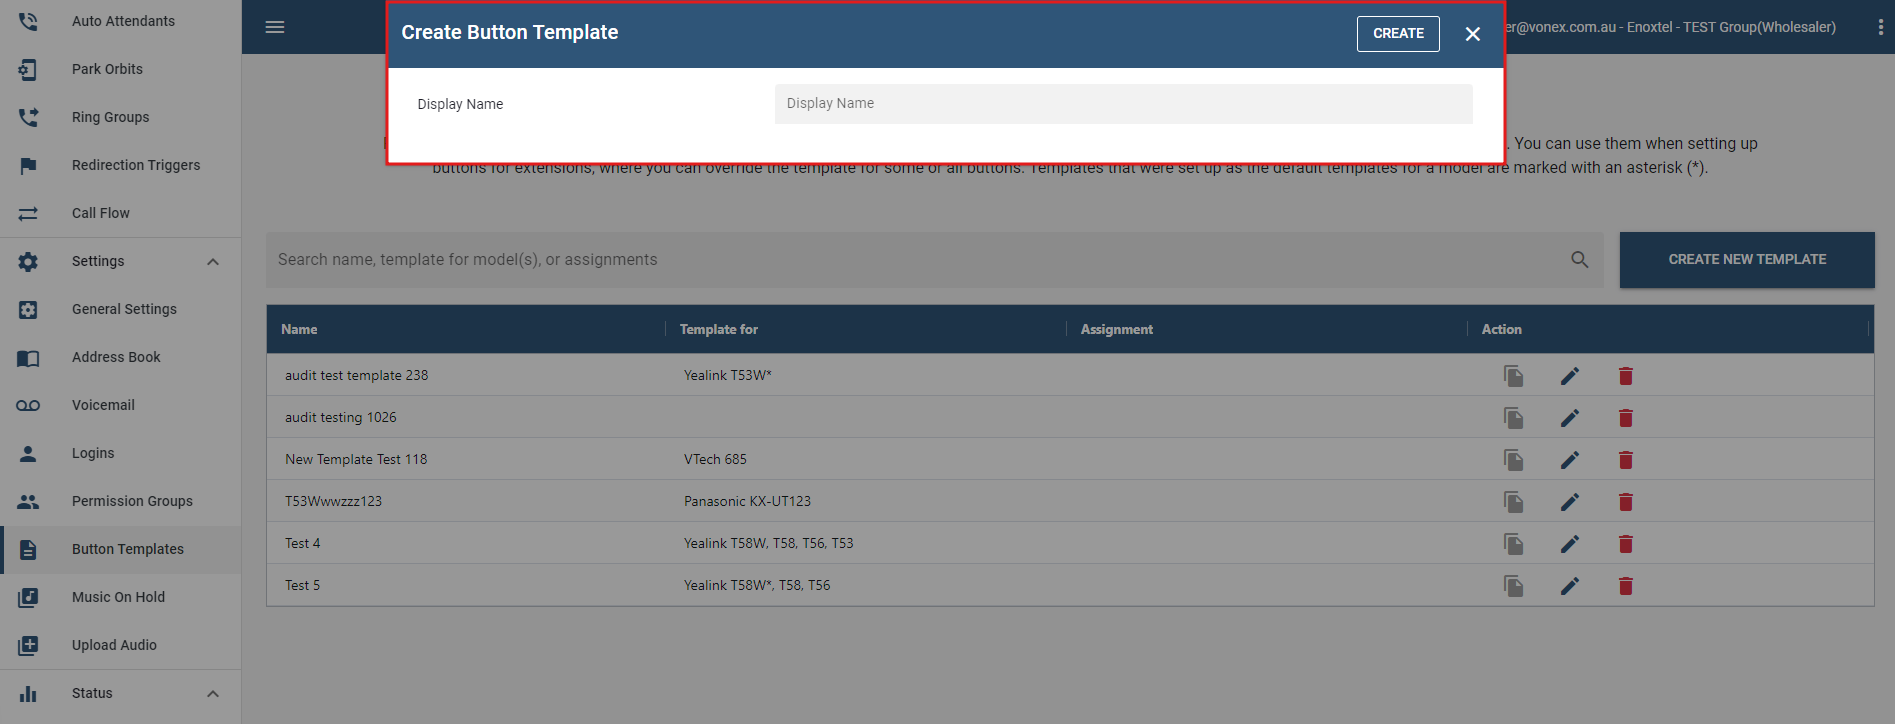
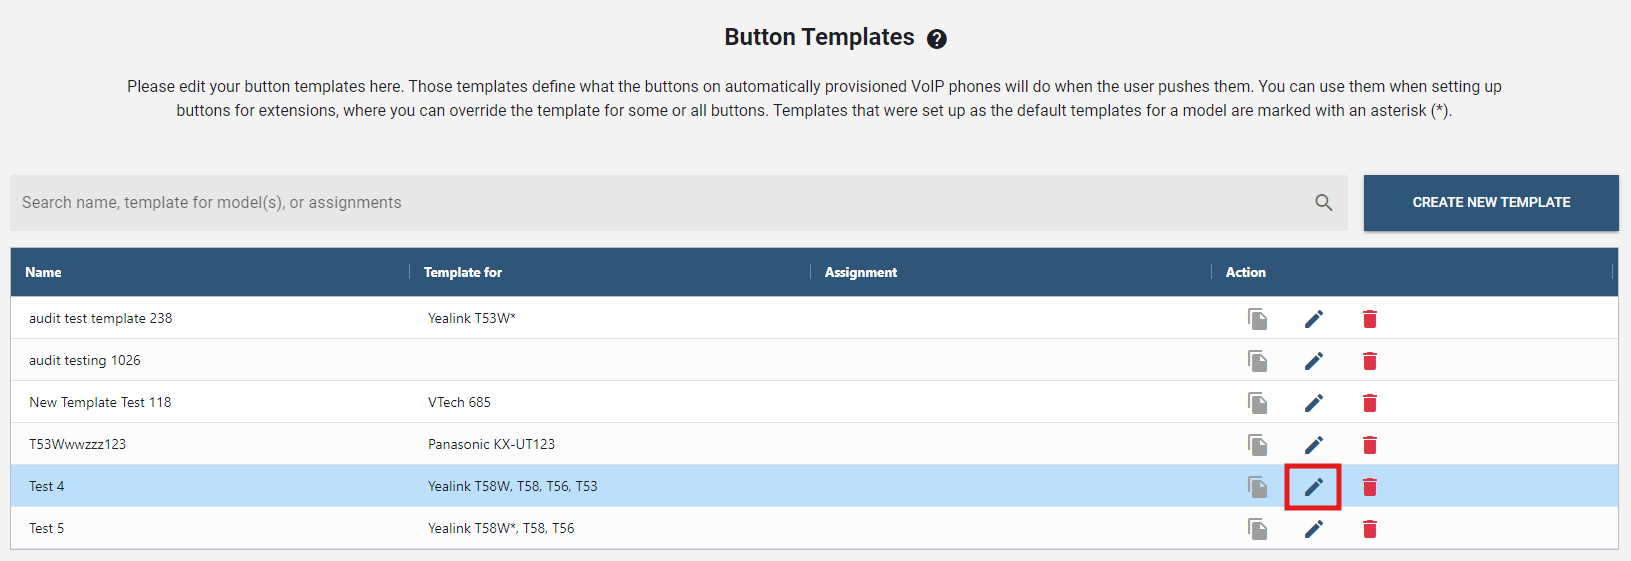
The newly created template will then appear in the list.
To configure, click on the "edit icon" under the Action column and a new pop up would give you a chance to edit the button template.
 Note: Once any adjustments are made, simply click the button to confirm and process the updated configurations.
# Add and Map Buttons
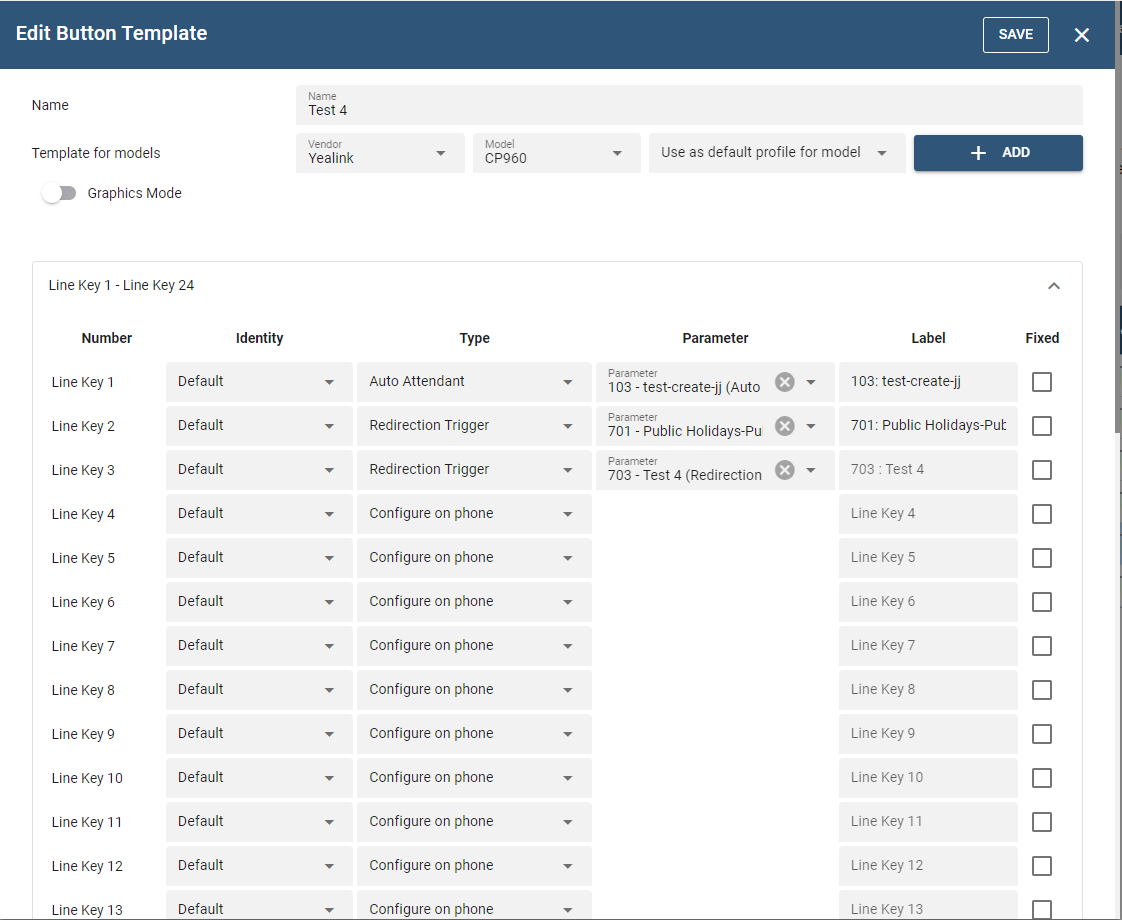 Once a profile has been created, it can be edited to add or modify buttons for that profile, which will hold true for all the identical model phones on that domain.
Multiple fields have been added in the buttons section as shown below.
- Number: This field helps to assign the button to the phone itself or the expansion module. So it's denoted by P 1, P 2, P 3 etc. meaning Page 1 button 1 (for the phone models which have only single page) and so on. If there are multiple page phone models, the denotation is P1 1, P1 2....P2 1, P2 2... so on. But, the expansion module generally can be multiple, hence they are numbered as E1 1, E1 2, E1 3...E2 1, E2 2... and so on meaning, module 1 page 1, module 2 page 1 etc. with a maximum of 3 expansion modules that can be added. We also have included the USB extension board for the Snom models. The limit of which can be 3 per button template and they range as U1 1, U1 2, U1 3....U3 1, U3 2.. so on. Following this selection, choose a number for the button. This number determines which button on the phone will be mapped to this button and get these settings. It may be different for different phones and models. More details on button numbers are given below.
- Identity: With the new buttons feature, up to nine identity buttons can now be assigned. Each button can be specifically chosen to be assigned to the identity of one's choice.
- Type: Choose the button Type which is a drop down list from which to choose.
- Parameter: Assign the required parameter to the button. This value will generally consist of an account on the system or an extension.
- Label: The labels are generated automatically when the Parameter field has been entered. In short, the PBX takes care of that, but assigning a different name to that particular button is achievable by overwriting it. Note: Label is used only where phones use a display in front of their keys for labels or virtual keys.
- Fixed: This field when checked, doesn't allow the user to change the buttons from their end. This makes it a lot easier for the System Admins to handle the buttons once they are assigned so that the user cannot fiddle with it from the user portal.
# Assigning Button Profile to an Extension
- Go to the extension to which you want to assign a particular button profile.
- Go to the "Buttons" section of the extension.
- In the "Use Template" dropdown, select the profile you want to assign to that extension, which can be any of the phone defaults or any other profile you might have created.
- Press ""SAVE"".
Furthermore, you can make changes to that chosen profile as it appears below on that page. In order to customize it for that extension, simply make the modification within the existing profile and click "SAVE".
# Music On Hold
On this page, the option to create, modify, or remove music on hold files, as well as control user interaction during playback are available.
Music on hold (MoH) is recorded music that callers listen to while waiting on hold. It is used to avoid silence on the line and is used in several places of the system: when a call is on hold and when a caller is waiting in an agent group queue. The system allows three different source types for its music on hold: file, wave input, and RTP stream. These sources serve different purposes and are detailed below. The sources can be used in parallel in different locations on the same system. They can be assigned to different domains or all domains so that they can appear as moh options in those domains.
Files: The system can use one or more files for MoH. These files are read by the system on demand and are played in an endless loop. Files must be placed manually into the audio*moh directory of the system. Although files are loaded only once, long files will be read into memory and can consume a lot memory space. Keep in mind that each minute of the file will require about 1 MB of memory space, so a 7-minute file will take up about 6.7 MB (128 kbit/s * 7 _ 60 seconds). After it gets past the initial hick-up (jitter), subsequent calls to the MoH file will be smooth. Format: Files must be in 8-kHz sampling frequency, and they should be in 16 bit per sample signed format. The format must be mono WAV. You may also use other formats (u-law and GSM), but these formats will have less audio quality and require more CPU performance.
Wave input: In Windows, the Vodia pbx can read MoH from an audio input jack, which is a convenient way to connect a CD, MP3 player, or a radio to the system. The disadvantage of this method is that only one external music source can be used. You can also internally loop the audio output of the local computer back to the audio input of the computer. This allows you to use an MP3 player running locally to provide a large number of MP3 files. However, we recommend keeping an eye on the memory usage of the MP3 player, as some players have memory leaks and slowly consume the memory of the computer. MP3 and WAV files can be converted to the required format.
Note: This feature is currently available only for Microsoft Windows-based operating systems. The appliance uses the RTP streaming mode for the audio input jack.
RTP stream: Streaming RTP data is a popular way of providing music from external sources. As with a telephone conversation, the system receives the audio data in a standard RTP stream. Several external tools are available that are able to generate a compliant RTP stream. Because the system can have several RTP streams, you can use this method to generate different music on hold sources for the system. Format: The RTP stream must use G.711 encoding. No SIP signalling is involved with this method, and the system does not send RTP data back. Important: Be sure to specify the port on which the system should listen for RTP input (e.g., 42000). This port must be available on the system. If you change the setting, you might need to restart the system service so that the change takes effect.

# How to Add MOH SOURCE
- To add, click on the button.
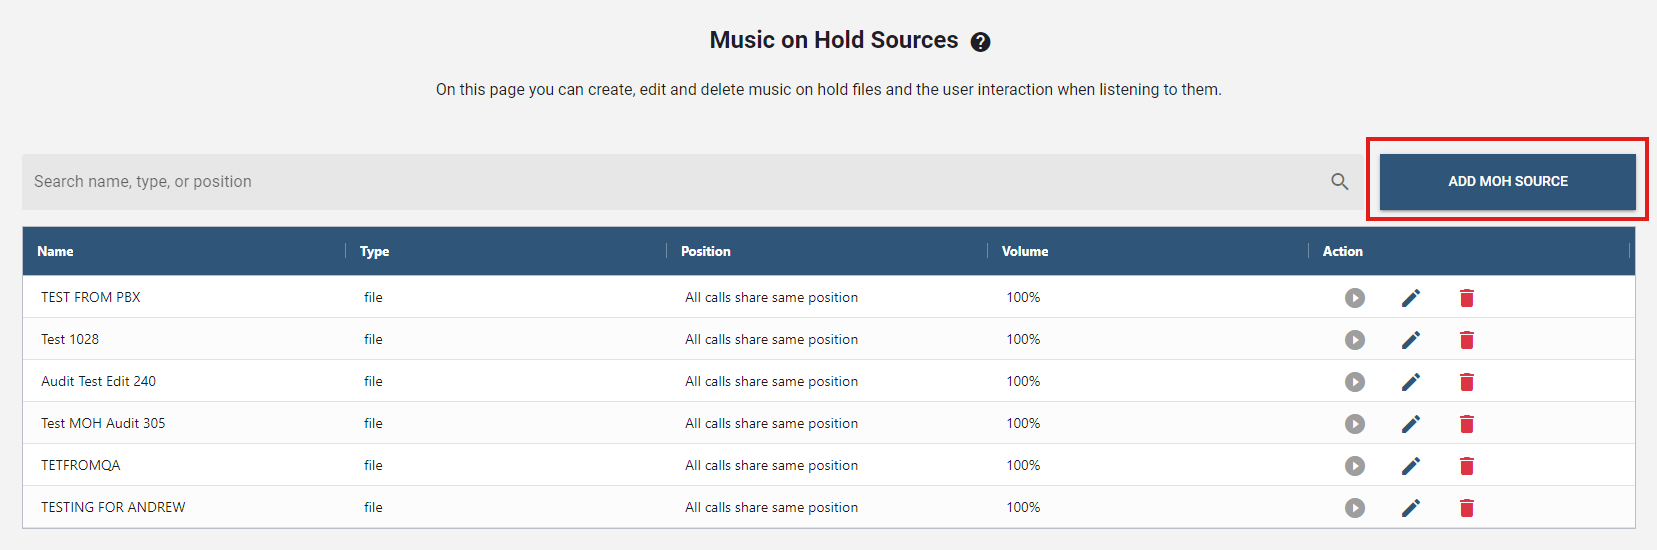
- Once clicked, a new window will pop up. Provide the required fields.
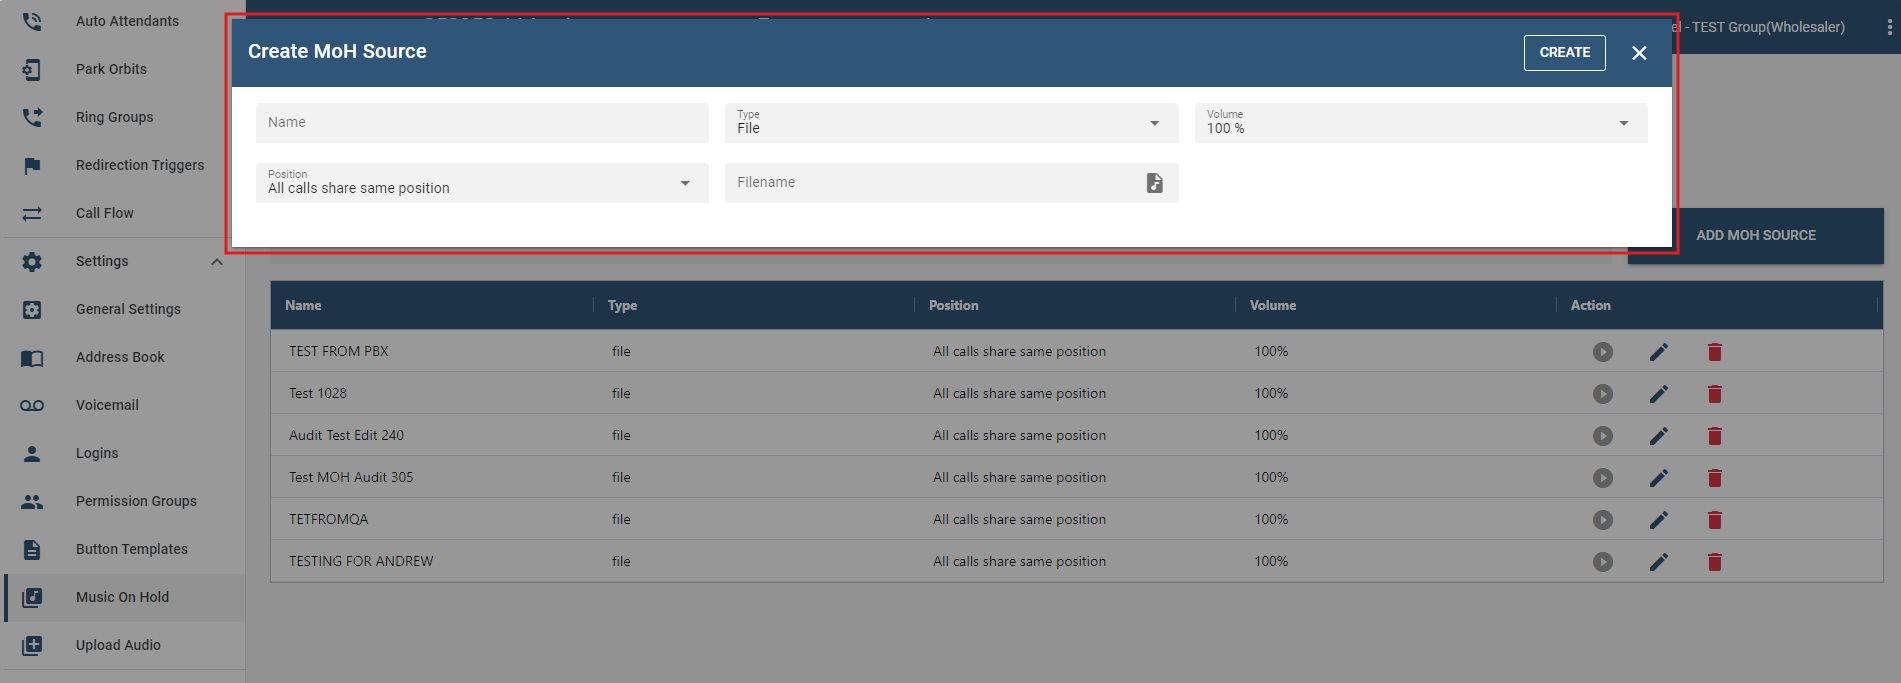
- Name: Assign a name to the MoH source (this name will appear in the Available Sources list where ever it can be used).
- Type: Select the desired MoH type from the dropdown menu. The available fields will vary depending on the MOH type selected.
- File: If you are using files, upload the file by clicking Choose File in Filename. (Once the file has been uploaded, it will automatically get filed in the audio_moh directory)
- WAV Input: If you are reading MoH from an audio input jack, the Filename field will disappear.
- RTP Stream: If you are streaming RTP data, enter the port on which the system should listen for RTP input (e.g., 42000). This port must be available on the system. If you change the setting, you might need to restart the system service so that the change takes effect. You will also see more options appear when you select "RTP Stream" as shown below.
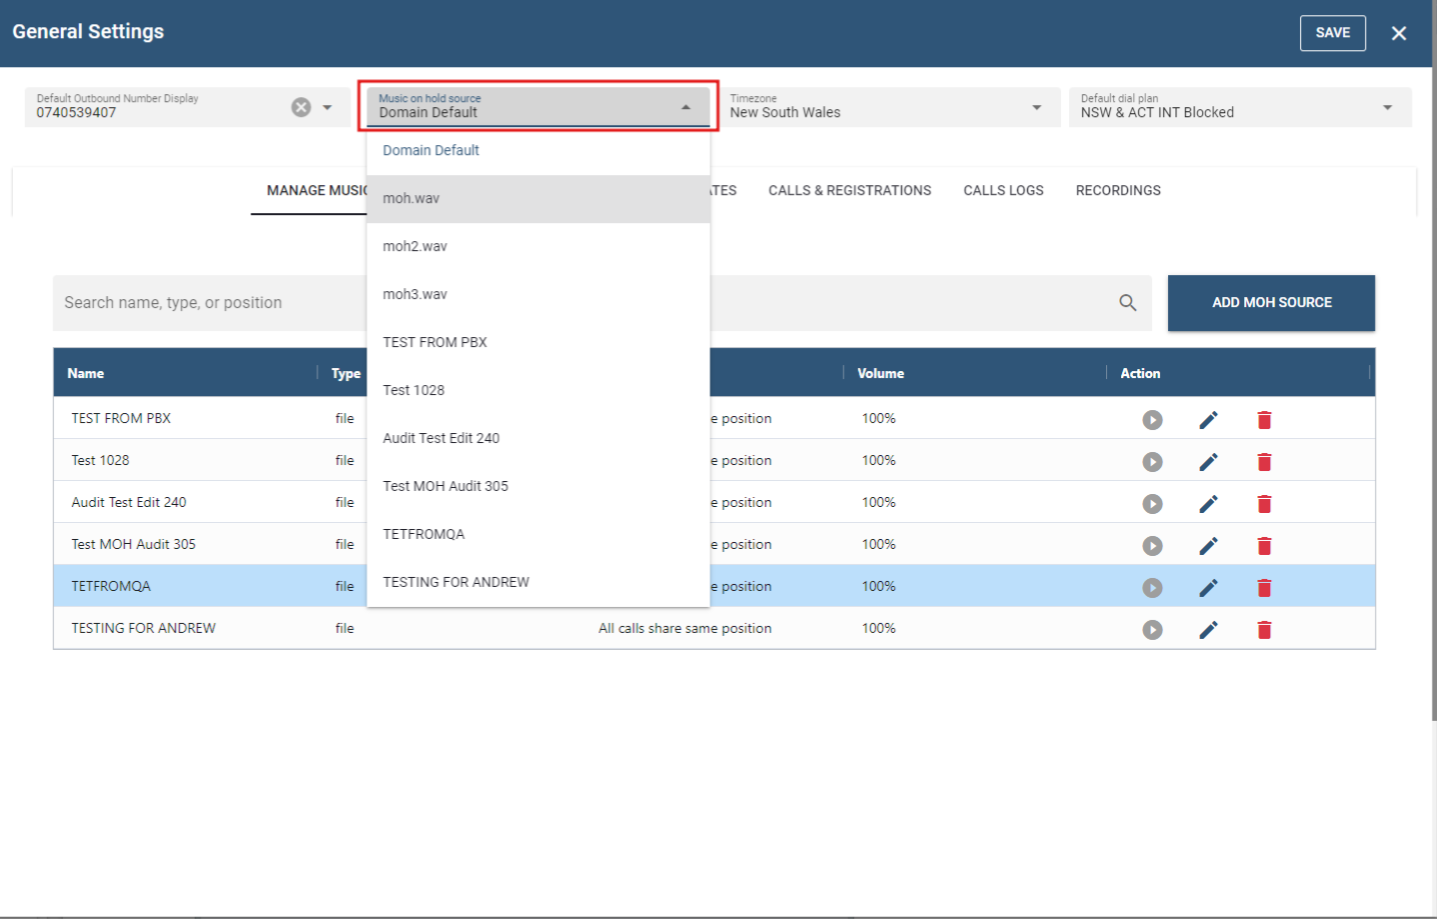
- Once done, click . The newly created MOH source will be listed as an available source.

- To verify that the source has been added on the domain level, navigate to Domain > Callflow > Settings. The newly added source will be displayed in the Music on Hold Source dropdown.
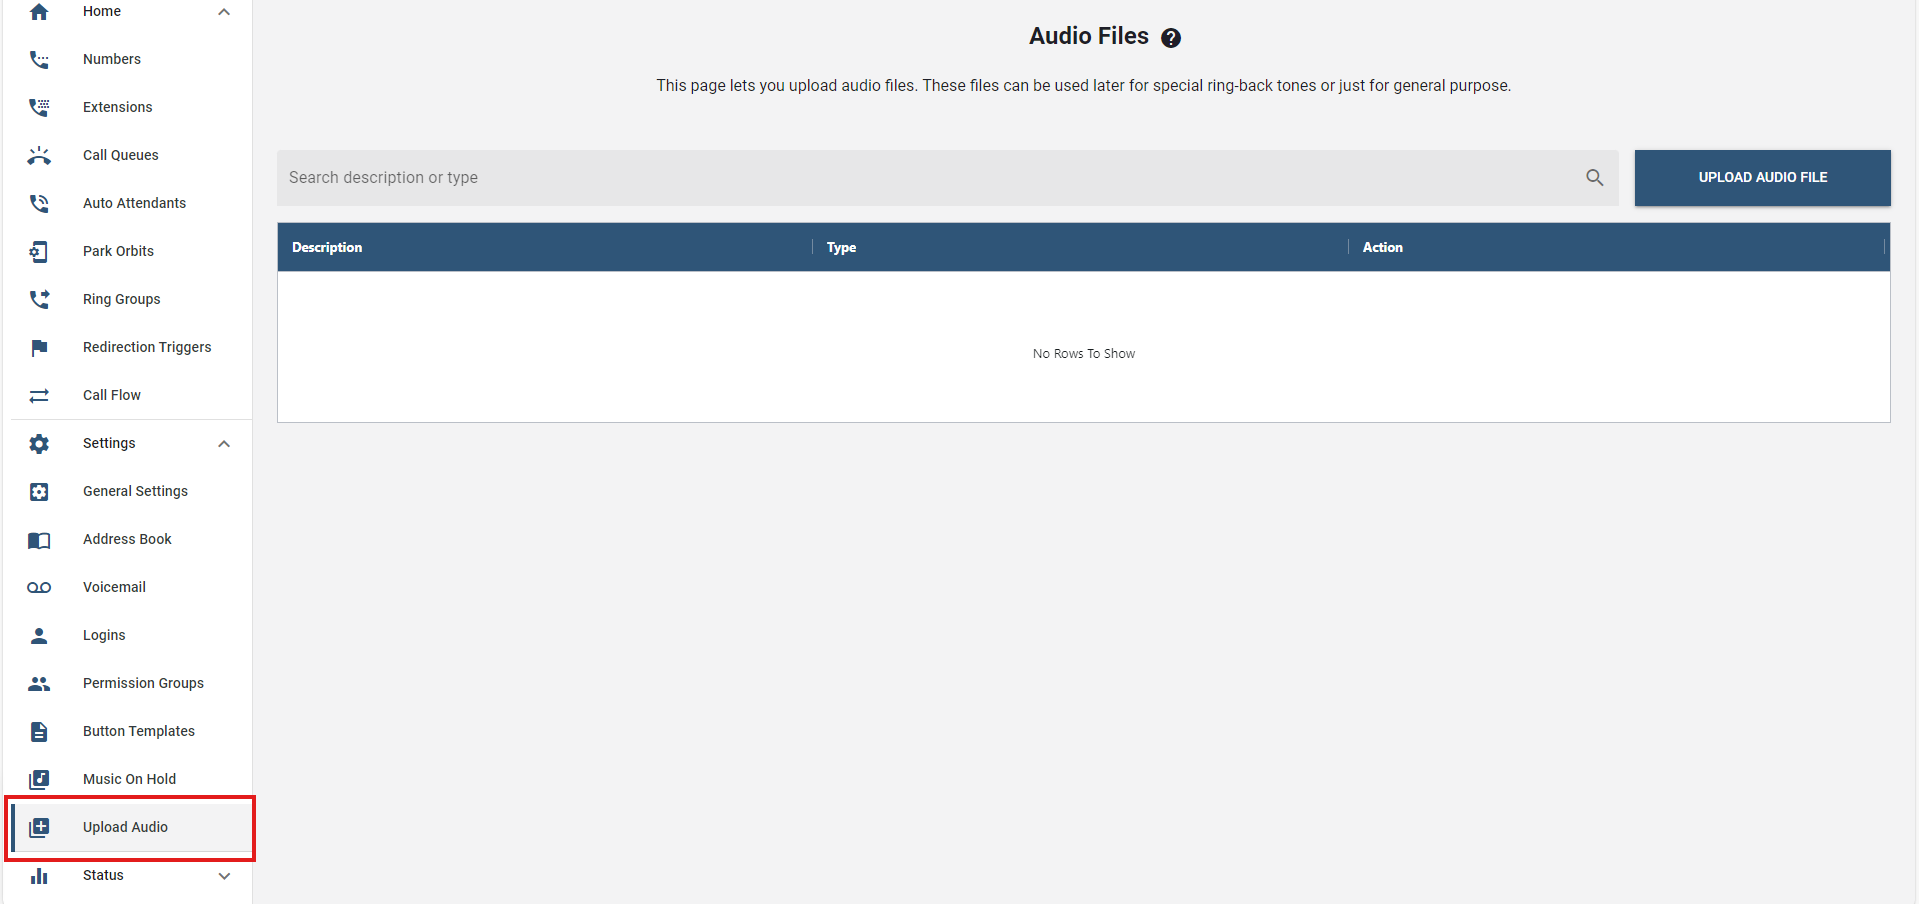
# Upload Audio
This page lets you upload audio files. These files can be used later for special ring-back tones or just for general purpose.
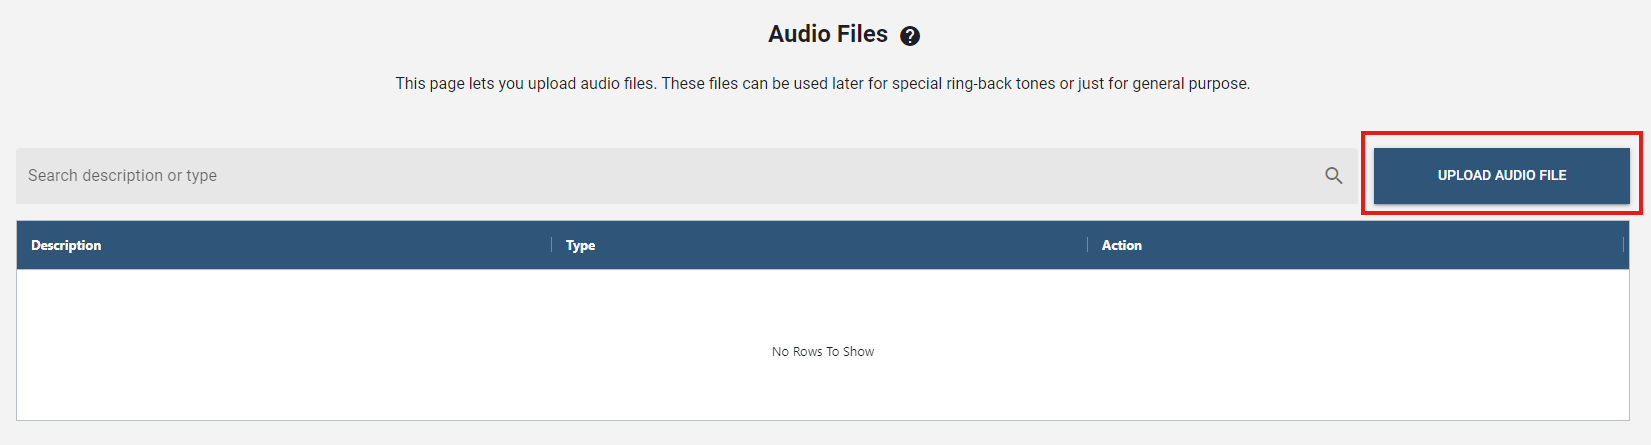
To add an audio file:
Click the To add, click on the button.
Type a description and choose the appropriate options from the drop-down menus.
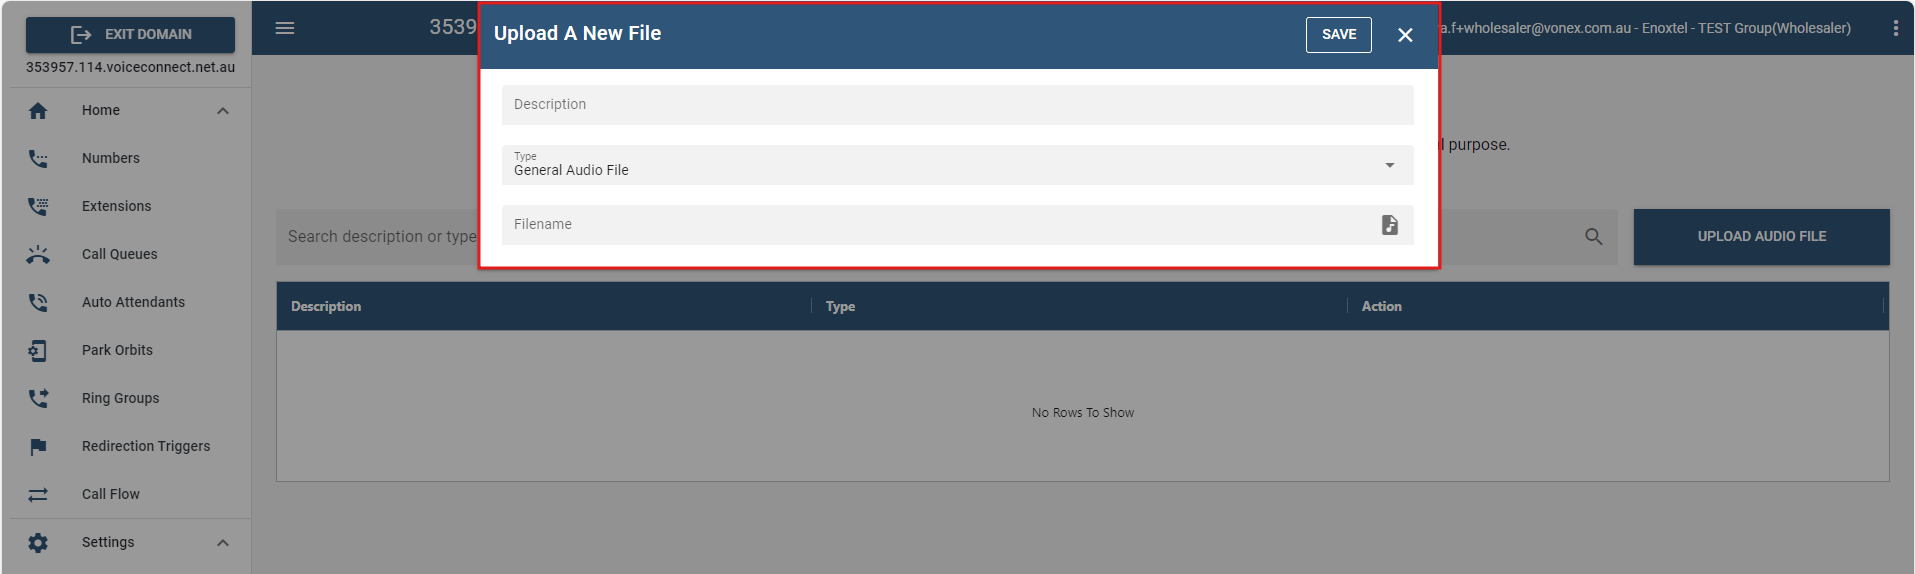
In the "Filename" field, upload the audio file that you would like to add. Files need to be in .wav format, in mono, and 8 kHz.
Once done, click .
The newly uploaded audio file will be displayed on the list.