# Redirection Triggers
There are many places in the PBX where binary decisions have to be made. Redirection Triggers are used to make those decisions. A typical redirection trigger would be on during office hours, and off outside office hours.
Redirection triggerd can be time-based or manual. When time based, the system automatically changes their state depending on the times that were set up. Users can still override those states with manual interactions. Manual redirection triggers change their state only when a user explicitly changes the state.
Examples for using redirection triggers include:
- Routing calls outside of business hours to a mailbox
- Determining when to call users on apps
- Adding agents to call queues during peak hours
Redirection triggers can be called like other accounts. Depending on the setup, this will change of the flag. The list of users that can change a redirection trigger can be set up in the redirection triggers settings. Redirection Triggers can be monitored on BLF, so that users can easily see their state on VoIP phones.
# Creating a Redirection Trigger
Redirection Triggers can be set up like other account types.
- Select a tenant in the Link web interface.
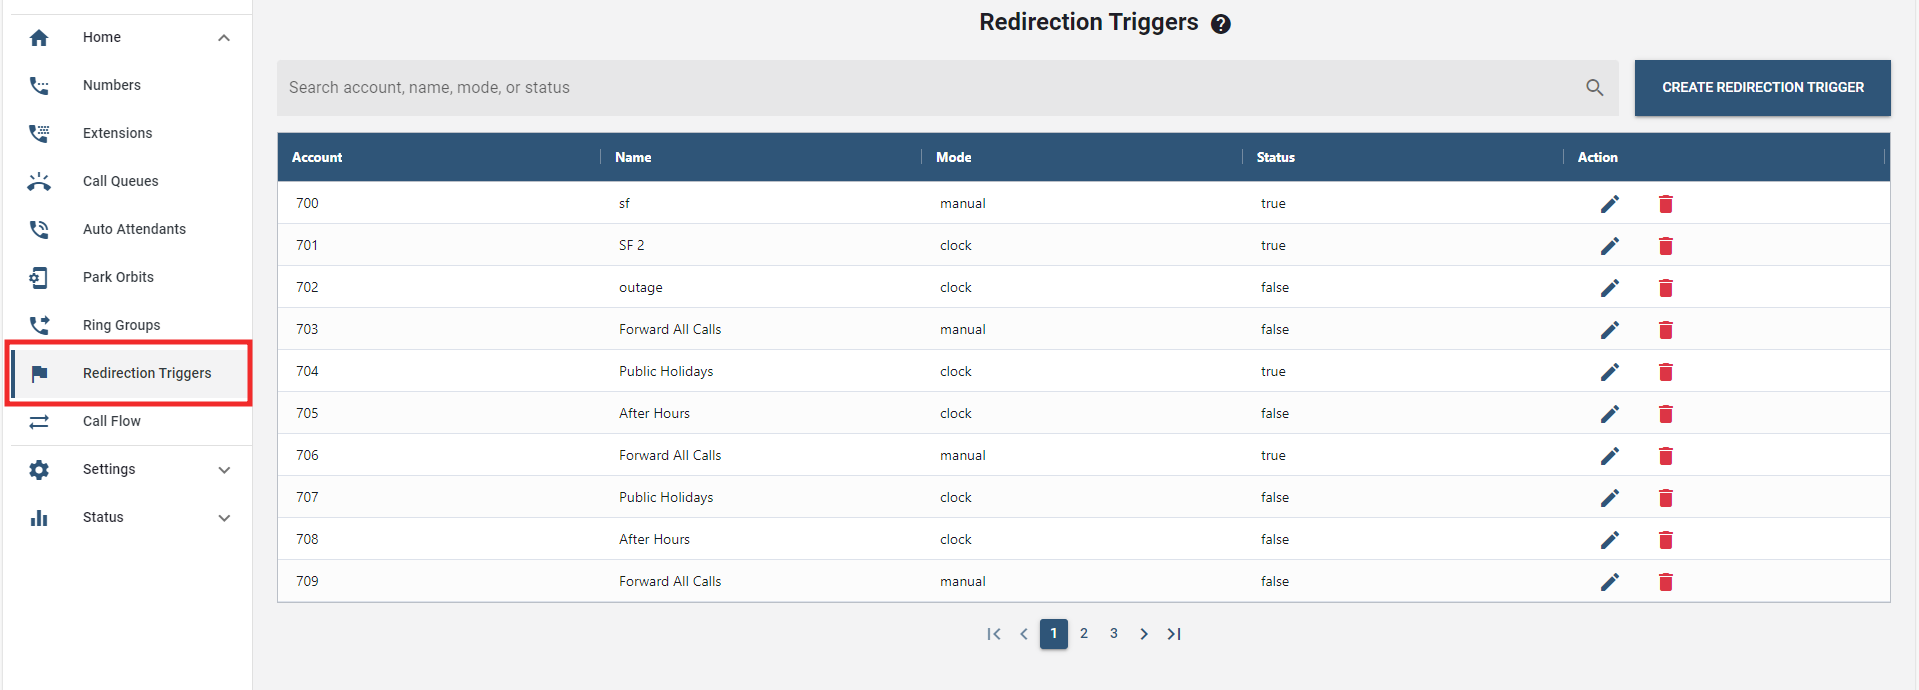
- On the sidebar menu, select the "Redirection Triggers" tab under the Home tab.
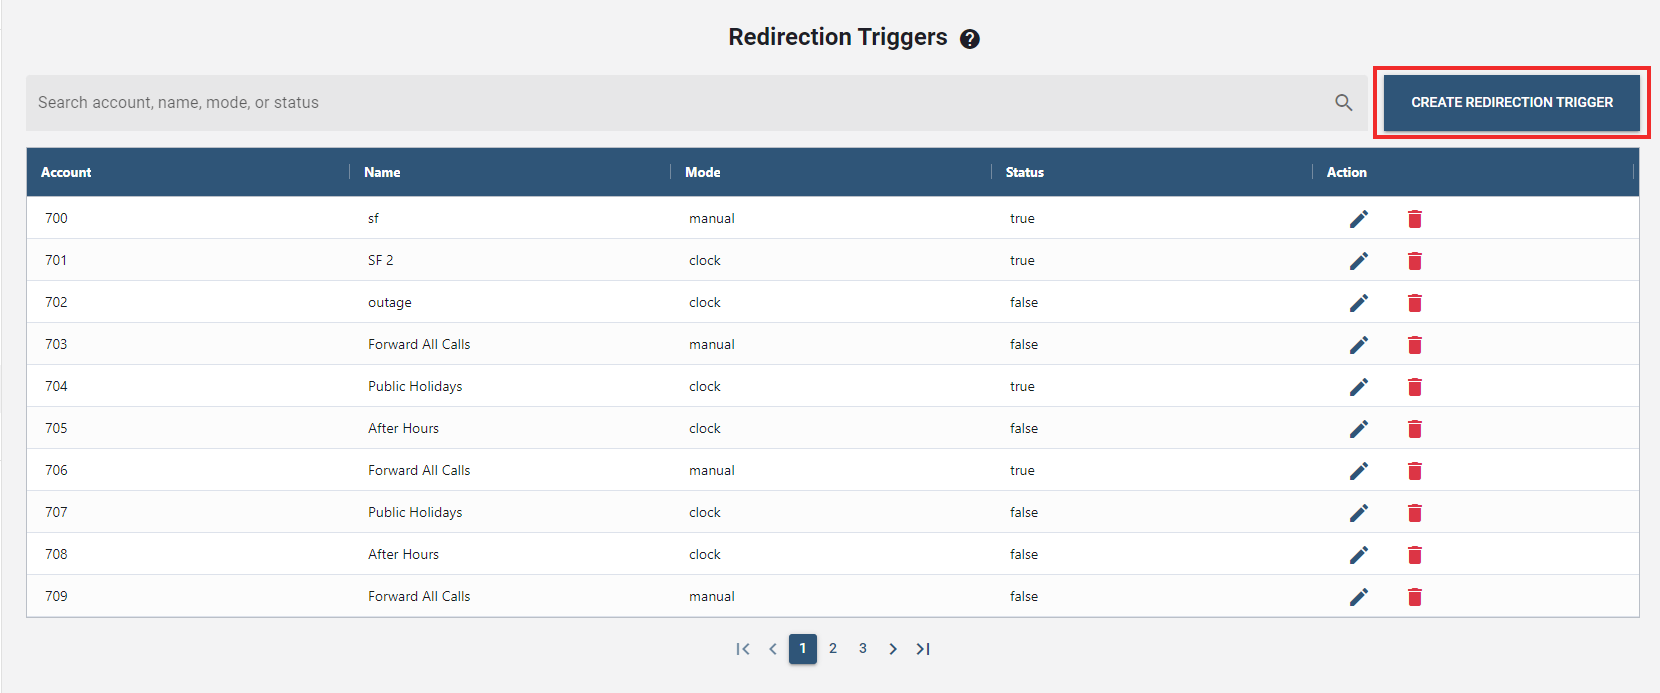
- Click the button to create a new redirection trigger.
- In the Display Name field, enter a descriptive name for the new redirection trigger.
- Lastly, press .
The new redirection trigger that have been created will be displayed in the list. This can be configured and deleted through the icons under the Action column.
# Configuring Redirection Trigger
- Select a redirection trigger to be configured from the list.
- Click the "edit icon" under the Action column.

- Following that, a new window will pop up to configure the details.
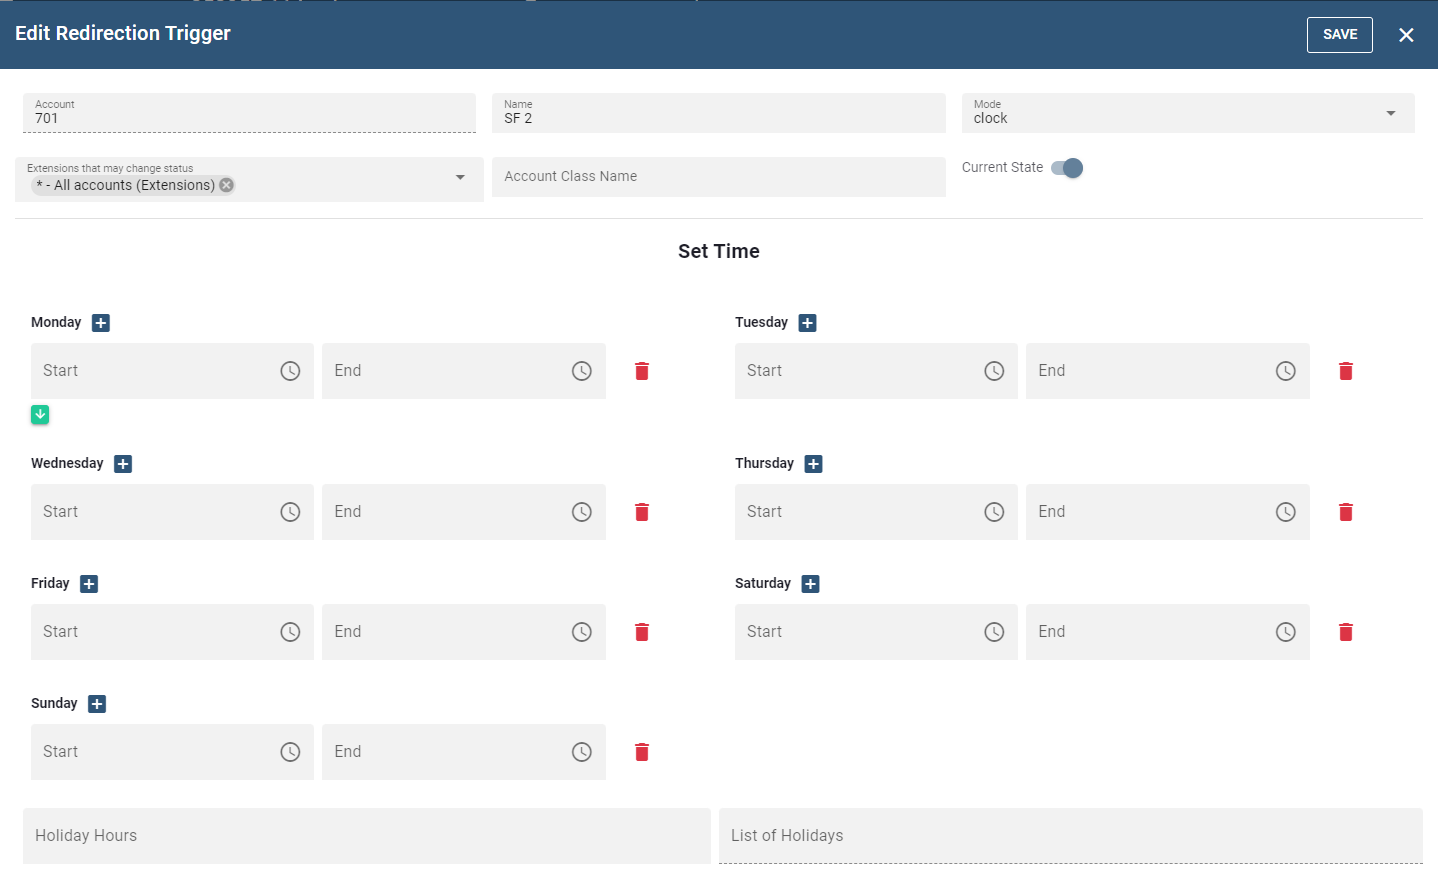
- Account number(s): This field takes extension number(s) and/or DID number(s). Like with the other account types, the list of numbers must be separated by a semicolon.
- Display name: The descriptive name for the flag.
- Mode: The redirection trigger can be controlled either manually or automatically.
- Manual: In this mode, a user must set the state of the flag manually. Three methods are available for activating/deactivating a manual redirection trigger: Dialing the redirection trigger account number from the phone, configuring a redirection trigger button on a VoIP phone, and using the Current State setting from the redirection trigger account page.
- Automatic: This redirection trigger is controlled automatically according to a set schedule. Users can still manually change the state of the flag, but the system will transition the state at the set-up times.
- Extensions that may change status: Enter the extensions that are permitted to change the redirection trigger. A (*) indicates that all users are permitted to change the status.
- Current State: This setting is reserved for the manual mode only. Choose Set to activate the redirection trigger and Clear to deactivate it.
- Monday-Sunday: For each day, these fields take the time when the flag is active or inactive (depending on the logic). The field takes time intervals, separated by a space. Each interval contains the beginning time and the end time, separated by a -. The time can be in 24-hour format including minutes or seconds, or it can be in AM/PM format. The end time can be at 24:00 or 12:00A.
- Holiday hours: If the day is a holiday, this setting will take the time when the flag is active or inactive (depending on the logic). The format is the same like Monday-Sunday.
- List of holidays: This field takes a list of days, either single days or date ranges separated by a -. If the day contains the year, the holiday will be limited to that specific year, otherwise it will be always on that day of the year. There are three different formats for days:
- MM/DD or MM/DD/YYYY: In locales where the month is used before the day (e.g. United States) this format will be used.
- DD/MM or DD/MM/YYYY: In locales where the day is used before the month (e.g. Great Britan) this format will be used.
- DD.MM or DD.MM.YYYY: This format is used for locales with '.' as separator.
NOTE: Once any changes are made, click the button to confirm and process the updates.
← Ring Groups Call Flow →